One of the things I tend to forget about making terrain after not doing it for a while is that it does take a while to get anywhere. And annoying little things always seem to conspire and get in the way – like having to go into work today on a Sunday (OK, OK, cue violins !)
So, in other words, I got a decent start on the second of the special No Man’s Land boards which I’d started in March, but I’ve nowhere near finished. I think all the techniques I have blogged about before, so these are just some pictures letting you see the (slooow) progress so far.
I wanted to try and break up the flat terrain style I’d used before on other trench bases. Contours can be difficult in making wargames terrain, particularly if you don’t have a very large area in which to contour. Too much contouring, and the figures may not be able to stand on the slope – not enough and it just looks flat. I tried to compromise with cutting some foamboard shapes and gluing these to the Styrofoam base.
I then added some more tree armature branches into the shattered tree stumps on the single copse base of the No Man’s Land trench board.
I’d tried on the terrain board to create the impression of hastily sapped out trenches to craters around the old trench system. I wanted to get away from neat trenches on these parts of the board, and therefore revetted these trench sides with corrugated card (representing hastily stacked corrugated iron) and the base of these improvised trenches with resin-cast wicker fascines. I used a generous sprinkle of small pebbles sieved from a bag of builder’s sharp sand to create the impression of repeated shelling, crumbling trench walls and general chaos.
I find it easiest to cut the towelling terrain to shape while the sytrofoam base is free from the PVA/Polyfilla mix. It takes a bit of time to ensure you cut around the various shell holes, trenches and so on.
Then I simply covered the base with the PVA/ Polyfilla/ dark brown paint mix, and sprinkled with gravel and sand.
That leaves a lot more greenstuff sandbags (a.k.a. the return of the very small sculpting pin!), and the extra detailing I want to try and do on this base in particular. It’s hopefully going to be a busy terrain-making week!
Sunday, 15 May 2011
Sunday, 8 May 2011
Play-testing Wargames: The Battle of Terrace Hill
We have been hard at work at Lard Island testing a set of battalion level rules for the Boer War over the past month or so. Much to my surprise, this has been a period which all of the players at the club (including myself) have really enjoyed playing.
At first sight the period did not seem very promising. The Boer War is tarnished by memories of the very bitter struggles of the final parts of the Second Boer War, and remembered for a tough guerrilla campaign fought by both sides. This did not seem like fertile ground for enjoyable wargaming.
However, Richard Clarke and my other chums at Lard Island were undeterred. Undertaking a lot of research into the battles of Colenso, Spion Kop, the attempts to relieve Ladysmith and the campaigns cross the Tugela River, I’ve been privileged to enjoy some fine wargaming in which the bravery of the two sides and the difficulties of coordinating battles in the War have come through clearly.
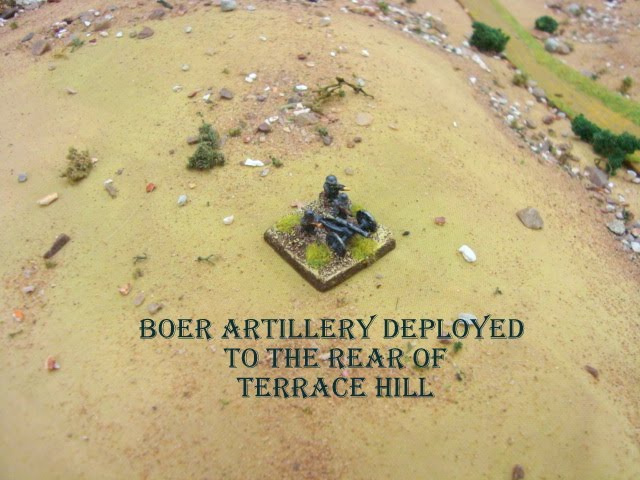
Last Tuesday we played through the battle of Terrace Hill, now renamed Hart’s Hill in memory of the engagement. Richard has posted a full battle report on his own blog, so I’ve not tried to rewrite his excellent summary of the wargame. I thought I would add a few additional photos here and also, as a play-tester, give a few thoughts on what sort of thing I like to look for in helping to play-test and develop a historical wargame.
The Battle of Hart’s Hill
Very briefly, the game focused on an engagement whereby the British commander, Major General Fitzroy-Hart, commanded his Irish battalions to launch an attack on Terrace Hill in the hope of turning the Boer defences and thereby allowing his fellow British commander, General Wynne to continue his advance across the Tugela River and onward to relive the strategic town of Ladysmith.
Fitzroy-Hart’s attack on the Boer positions started late in the day, with his Irish Brigade utilising the high banks of the Tugela to advance under cover to a point from which they could launch their attack on Terrace Hill.
The Boer defences were carefully sited and provided an inter-locking position, with Terrace Hill being supported by Boer forces on Hedge Hill, Railway Hill and Pieters Hill.
The Irish forces led by Fitzroy-Hart therefore faced a tough task, advancing upon a hill with little cover, under enemy fire. I played the role of Fitzroy-Hart, and was hampered by an in-built command and control disadvantage to replicate the “friction” within Fitzroy-Hart’s generalship. On the day, Fitzroy-Hart did not cross the Tugela River, being content to try and command the action through a series of bugle calls from the far bank. The historical result, in the noise and heat of the battle, was predictably disastrous.
With the other Irish Commanders, Nick and Big Al, we focused our attention on an advance of Terrace Hill, using a crack battalion of the Connaught Rangers which would follow up a bombardment on Terrace Hill by Naval guns deployed (appropriately enough) no Naval Hill.
I planned to shield the Boer positions on Hedge Hill and Railway Hill with other Irish battalions, which could advance purposefully and threaten the inter-locking Boer forces and disrupt their fields of fire.
The battle was pretty ferocious, with the flanking Irish battalions, the Dublin Fusiliers and Iniskillings, taking very considerable fire from Boer positions and artillery.
However, the sacrifice of the Dublins and Iniskillings made sure that the central assault, led by the Connaught rangers on Terrace Hill, was able to progress with few casualties until the key moment of impact.
Unfortunately, having taken the Hill, the Connaughts were unable to hold the position in the teeth of concentrating Boer fire, and fell back slightly, supported by Naval guns re-targeting the newly discovered Boer second–line of defences to the North of Terrace Hill.
You might be wondering at this point if there’s anything more to say, or perhaps why I chose the title “Play-testing wargames” for this blog post. I wanted to share a few of the things which interest me about play-testing and designing wargames, and how I approach that part of the hobby.
Being there: I like to read military history. My guess is, so do you! A good historian puts you, the reader, in a position of understanding the opportunities, tensions and challenges relating to the conflict in question. I like wargames which try and do the same. There has been a very interesting debate on the wargaming internet and forums in the first part few months about whether a wargame can enhance your understanding of history. I think that the jury is perhaps out on that (although my own personal view is that it has the potential to do just that). But even if my understanding of history is not enhanced, I like to feel that (however superficially) playing a wargame has somehow attempted to put me in the boots of those who were fighting historically and to better appreciate the challenges they faced.
What am I thinking about?: When I am play-testing a wargame, am I thinking about rules, dice, templates, measuring, additions or subtractions for basic values? Or I am focused on the relative merits of tactical approaches, formations, firing and assaulting? Of course, I do both at different times in a game, but I prefer games when I’m trying to think about the tactics of the period (and perhaps an umpire really helps here) than just thinking about how the rules provide advantages which are then sought by players.
The Road to Victory: I like to understand a game’s result and figure out why I won or lost. In play-testing, I also like to try and press the designer to explain the theme of the game, and how that theme relates to winning or losing a game. Where the intended theme, and my understanding of the reasons behind a defeat (or victory) are the same, the development of the game is probably going in the right direction.
In our game of Terrace Hill, Rich had identified a number of themes in reading about the historical battles of the Second War in advance of the games. The difficulty of co-ordination of attack and defence was one of these. In our game of Terrace Hill, despite my best efforts the British forces of Fitzroy-Hart struggled to coordinate an attack and found difficulty getting artillery and infantry to work in unison. This would be an example of where I feel that the theme which the designer had in mind has come through strongly in the game.
So there we have it. My views on play-testing a wargame. Not rocket science, but like a lot of simple things, difficult to do well. And perhaps most frustrating of all (at least for me) is play-testing historical engagements and making precisely the same mistakes as your historical counterparts .... week after week!
At first sight the period did not seem very promising. The Boer War is tarnished by memories of the very bitter struggles of the final parts of the Second Boer War, and remembered for a tough guerrilla campaign fought by both sides. This did not seem like fertile ground for enjoyable wargaming.
However, Richard Clarke and my other chums at Lard Island were undeterred. Undertaking a lot of research into the battles of Colenso, Spion Kop, the attempts to relieve Ladysmith and the campaigns cross the Tugela River, I’ve been privileged to enjoy some fine wargaming in which the bravery of the two sides and the difficulties of coordinating battles in the War have come through clearly.
Last Tuesday we played through the battle of Terrace Hill, now renamed Hart’s Hill in memory of the engagement. Richard has posted a full battle report on his own blog, so I’ve not tried to rewrite his excellent summary of the wargame. I thought I would add a few additional photos here and also, as a play-tester, give a few thoughts on what sort of thing I like to look for in helping to play-test and develop a historical wargame.
The Battle of Hart’s Hill
Very briefly, the game focused on an engagement whereby the British commander, Major General Fitzroy-Hart, commanded his Irish battalions to launch an attack on Terrace Hill in the hope of turning the Boer defences and thereby allowing his fellow British commander, General Wynne to continue his advance across the Tugela River and onward to relive the strategic town of Ladysmith.
Fitzroy-Hart’s attack on the Boer positions started late in the day, with his Irish Brigade utilising the high banks of the Tugela to advance under cover to a point from which they could launch their attack on Terrace Hill.
The Boer defences were carefully sited and provided an inter-locking position, with Terrace Hill being supported by Boer forces on Hedge Hill, Railway Hill and Pieters Hill.
The Irish forces led by Fitzroy-Hart therefore faced a tough task, advancing upon a hill with little cover, under enemy fire. I played the role of Fitzroy-Hart, and was hampered by an in-built command and control disadvantage to replicate the “friction” within Fitzroy-Hart’s generalship. On the day, Fitzroy-Hart did not cross the Tugela River, being content to try and command the action through a series of bugle calls from the far bank. The historical result, in the noise and heat of the battle, was predictably disastrous.
With the other Irish Commanders, Nick and Big Al, we focused our attention on an advance of Terrace Hill, using a crack battalion of the Connaught Rangers which would follow up a bombardment on Terrace Hill by Naval guns deployed (appropriately enough) no Naval Hill.
I planned to shield the Boer positions on Hedge Hill and Railway Hill with other Irish battalions, which could advance purposefully and threaten the inter-locking Boer forces and disrupt their fields of fire.
The battle was pretty ferocious, with the flanking Irish battalions, the Dublin Fusiliers and Iniskillings, taking very considerable fire from Boer positions and artillery.
However, the sacrifice of the Dublins and Iniskillings made sure that the central assault, led by the Connaught rangers on Terrace Hill, was able to progress with few casualties until the key moment of impact.
Unfortunately, having taken the Hill, the Connaughts were unable to hold the position in the teeth of concentrating Boer fire, and fell back slightly, supported by Naval guns re-targeting the newly discovered Boer second–line of defences to the North of Terrace Hill.
You might be wondering at this point if there’s anything more to say, or perhaps why I chose the title “Play-testing wargames” for this blog post. I wanted to share a few of the things which interest me about play-testing and designing wargames, and how I approach that part of the hobby.
Being there: I like to read military history. My guess is, so do you! A good historian puts you, the reader, in a position of understanding the opportunities, tensions and challenges relating to the conflict in question. I like wargames which try and do the same. There has been a very interesting debate on the wargaming internet and forums in the first part few months about whether a wargame can enhance your understanding of history. I think that the jury is perhaps out on that (although my own personal view is that it has the potential to do just that). But even if my understanding of history is not enhanced, I like to feel that (however superficially) playing a wargame has somehow attempted to put me in the boots of those who were fighting historically and to better appreciate the challenges they faced.
What am I thinking about?: When I am play-testing a wargame, am I thinking about rules, dice, templates, measuring, additions or subtractions for basic values? Or I am focused on the relative merits of tactical approaches, formations, firing and assaulting? Of course, I do both at different times in a game, but I prefer games when I’m trying to think about the tactics of the period (and perhaps an umpire really helps here) than just thinking about how the rules provide advantages which are then sought by players.
The Road to Victory: I like to understand a game’s result and figure out why I won or lost. In play-testing, I also like to try and press the designer to explain the theme of the game, and how that theme relates to winning or losing a game. Where the intended theme, and my understanding of the reasons behind a defeat (or victory) are the same, the development of the game is probably going in the right direction.
In our game of Terrace Hill, Rich had identified a number of themes in reading about the historical battles of the Second War in advance of the games. The difficulty of co-ordination of attack and defence was one of these. In our game of Terrace Hill, despite my best efforts the British forces of Fitzroy-Hart struggled to coordinate an attack and found difficulty getting artillery and infantry to work in unison. This would be an example of where I feel that the theme which the designer had in mind has come through strongly in the game.
So there we have it. My views on play-testing a wargame. Not rocket science, but like a lot of simple things, difficult to do well. And perhaps most frustrating of all (at least for me) is play-testing historical engagements and making precisely the same mistakes as your historical counterparts .... week after week!
Saturday, 30 April 2011
Six Weeks: The Short and Gallant Life of the British Officer in the First World War
My Easter present this year was “Six Weeks: The Short and Gallant Life of the British Officer in the First World War” by John Lewis-Stempel. I don’t really like chocolate, and this seemed a far better result than an Easter egg which I pass on to the kids a week after Easter Sunday!
I’d glanced at Six Weeks on Amazon a month or so back and was intrigued but didn’t really have any great desire to get a copy. However, I had a closer look at it shortly before Easter at a local bookshop and was quite impressed.
There’s a selection of interesting photos, the contents look clearly laid out and there seems to be a very extensive use of original sources, first-person accounts, diaries and letters. Flicking through the chapters, the books covers Joining Up, Training, the Journey to the Front Line, Trench Life, Leadership, Battle, Rest and Leave, Wounds and Hospitalization and Legacies. To me that looked pretty comprehensive. There’s a good bibliography, 19 pages of notes and a decent index.
I’ll let you have a review once I’ve worked my way through it, hopefully a little later this week.
You might be wondering why I’m telling you this! I really enjoy reading on blogs about what other people are reading about, and whether what they’ve chosen to read lives up to expectations. I also thought that Six Weeks may give a few insights into the life of a junior officer on the Western Front who plays a big part in games of Through the Mud and the Blood, my rules of preference for our Great War games. It should be interesting to compare what Mt Lewis-Stempel says about the Subalterns. Lieutenants and Capitains of the Great War compared to other, perhaps more familiar, writers like Richard Holmes of Tommy fame.
And what better occasion to start a good read than the fine weather of a Royal Wedding and Bank holiday weekend!
In addition to Six Weeks and some other jobs around the house and garden, I also want to try and finish my second platoon of late war British figures for Through the Mud and Blood. These have been languishing in a box for a while now. Funny how the sunshine coming out gets you motivated! If I can get these chaps finished by next weekend, I’ll be really chuffed.
I’d glanced at Six Weeks on Amazon a month or so back and was intrigued but didn’t really have any great desire to get a copy. However, I had a closer look at it shortly before Easter at a local bookshop and was quite impressed.
There’s a selection of interesting photos, the contents look clearly laid out and there seems to be a very extensive use of original sources, first-person accounts, diaries and letters. Flicking through the chapters, the books covers Joining Up, Training, the Journey to the Front Line, Trench Life, Leadership, Battle, Rest and Leave, Wounds and Hospitalization and Legacies. To me that looked pretty comprehensive. There’s a good bibliography, 19 pages of notes and a decent index.
I’ll let you have a review once I’ve worked my way through it, hopefully a little later this week.
You might be wondering why I’m telling you this! I really enjoy reading on blogs about what other people are reading about, and whether what they’ve chosen to read lives up to expectations. I also thought that Six Weeks may give a few insights into the life of a junior officer on the Western Front who plays a big part in games of Through the Mud and the Blood, my rules of preference for our Great War games. It should be interesting to compare what Mt Lewis-Stempel says about the Subalterns. Lieutenants and Capitains of the Great War compared to other, perhaps more familiar, writers like Richard Holmes of Tommy fame.
And what better occasion to start a good read than the fine weather of a Royal Wedding and Bank holiday weekend!
In addition to Six Weeks and some other jobs around the house and garden, I also want to try and finish my second platoon of late war British figures for Through the Mud and Blood. These have been languishing in a box for a while now. Funny how the sunshine coming out gets you motivated! If I can get these chaps finished by next weekend, I’ll be really chuffed.
Wednesday, 27 April 2011
Sharp Practice - The Battle of Paloma Blanca
Last night, the sleepy Spanish fishing town of Paloma Blanca was disturbed by the rampaging military forces of three warring nations, a chest of Spanish gold, a sultry Marquesa, and a Captain of Artillery who clearly needed a new telescope.
Of course, such tomfoolery could only be part of the Easter weekend wargame at Lard Island, using the TooFatLardies Sharp Practice Napoleonic rules written by Lard Generalissimo Richard Clarke and umpired by that other bombard of sack, Nick Skinner.
A longer report of the game will soon be available at the TooFatLardies blog, which covers up for the fact I had to miss the end owing to a long phone call. I have also (ahem) slightly changed the names of the characters in the game ... this is a family blog, don’t ya know!
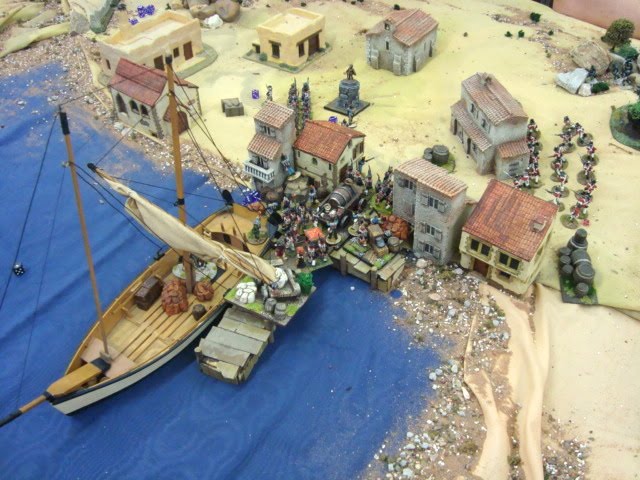
With that in mind, let me transport you back to the coast of Spain, in 1811, and the small, sleepy fishing town of Paloma Blanca, with its delightful harbour in which the French sloop, Vengeur, is anchored.
The locals of Paloma Blanca are proud of their heritage, the fine statue of Don Juan de Paloma Blanca commemorating his tiny part in the victory over the Turks at Lepanto. Rumour has it a townsman is employed each day to prevent a seagull landing on his noble statue...
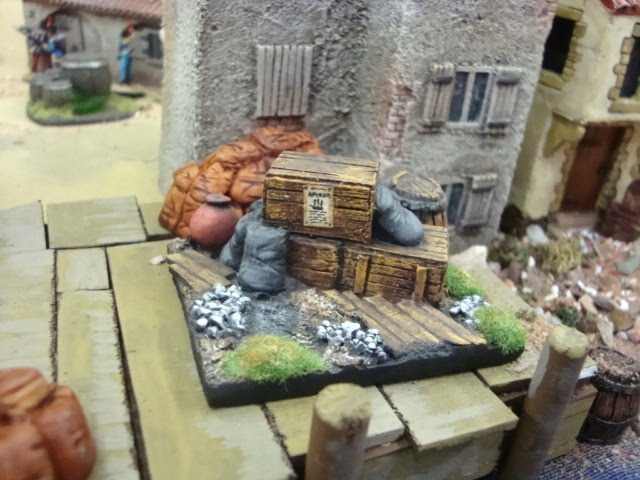
The town’s docks are busy, with crates of produce arriving from the Indies and Americas....
..... doubtless containing gaudy silks, gifts and other fripperies which the more.... errr.... “fashionable” gentlemen of the town can bestow upon their favourite Ladies of the Night...
But Palomba Blanca is far from a bed of languid iniquity. As well as the Vengeur, a shore battery guards the narrows, manned by the hearty soldiers of Spain...
....and led by the inspired Spanish and allied French commanders. What’s that? Did I hear a barely stifled laugh? Ladies and Gentlemen, I introduce your Allied commanders for the night (Elton, Panda and Mr T.)....
....and their British adversaries (Big Rich out of camera, Harpers, Daz, Big Al and Nick umpiring)...
So, the scene is set! The sun is high in the Spanish skies as the British riflemen, led by Captain Richard Fondleur, scout the edge of the town, accompanied by a force of jolly jack tars armed with a ferocious array of boarding mallets, billhooks and knives.
An alarum is raised by the Spanish Captain in the Tower, Fanciso de Rivera, and the lumbering behemoth of a 24 pounder cannon is trundled to face the attackers to landward.
As the Spanish defenders in the Tower make ready, the British riflemen skirmish with the enemy in the town outskirts, focusing their attack on a fortified hacienda.
The turn of the cards by Umpire Nick casts the net of fortune wide, with an ample selection of bonus cards for any Big Man to claim. A Marine landing party “grasp the nettle” with vigour, pressing into the centre of Palomba Blanca.
Meanwhile, quietly, secretively the French Consul, Colonel Daguerre makes his way, concealed from sight on “blinds”, to the docks with his chest of Spanish gold – destined not for the gilded halls of Madrid but for the salons of Revolutionary Paris.
Oblivious to Colonel Daguerre’s dark plans, the Spanish defenders of the town doggedly try and hold on, but are eventually routed from the hacienda...
.... and soon challenged by the jolly jack tars hacking down the main door of the Tower.
Desperately, the Spanish artillery commander, Don Hector Christo, orders his guns to fire across the bay on the British devils attacking the Tower, regardless of inflicting casualties on his own men. C’est magnifique, mais......well, sadly, you know the rest.
The Tower remains surrounded despite the withering artillery fire from across the bay...
...but help seems at hand with Sergeants Fraternité and Liberté and a platoon of French soldiers arriving in the market square...
....surely deliverance is near? Perhaps not that near, as with a collective groan from the British and Spanish players, Colonel Daguerre turns his loaded wagons along the dockside and commences loading the Vengeur, oblivious to the perils of his Spanish allies.
The Colonel must have a plan – he cannot simply be ignoring his allies in their of need, can he? Ah, mes braves .... war, well, it’s tricky. Nowhere near as simple as it seems. You know, there is this thing called strategy. It’s....how can I put it...complicated. Sometimes, it might seem that you're running out on your friends, but really, they just don’t know the whole picture...
As I mentioned, I sadly needed to leave at this point. Happily, the rest of the tale of treachery, bravery, wayward artillery and the lovely Marquesa Uma Paloma Blanca will shortly be published on the Lard Island Blog here.
Of course, such tomfoolery could only be part of the Easter weekend wargame at Lard Island, using the TooFatLardies Sharp Practice Napoleonic rules written by Lard Generalissimo Richard Clarke and umpired by that other bombard of sack, Nick Skinner.
A longer report of the game will soon be available at the TooFatLardies blog, which covers up for the fact I had to miss the end owing to a long phone call. I have also (ahem) slightly changed the names of the characters in the game ... this is a family blog, don’t ya know!
With that in mind, let me transport you back to the coast of Spain, in 1811, and the small, sleepy fishing town of Paloma Blanca, with its delightful harbour in which the French sloop, Vengeur, is anchored.
The locals of Paloma Blanca are proud of their heritage, the fine statue of Don Juan de Paloma Blanca commemorating his tiny part in the victory over the Turks at Lepanto. Rumour has it a townsman is employed each day to prevent a seagull landing on his noble statue...
The town’s docks are busy, with crates of produce arriving from the Indies and Americas....
..... doubtless containing gaudy silks, gifts and other fripperies which the more.... errr.... “fashionable” gentlemen of the town can bestow upon their favourite Ladies of the Night...
But Palomba Blanca is far from a bed of languid iniquity. As well as the Vengeur, a shore battery guards the narrows, manned by the hearty soldiers of Spain...
....and led by the inspired Spanish and allied French commanders. What’s that? Did I hear a barely stifled laugh? Ladies and Gentlemen, I introduce your Allied commanders for the night (Elton, Panda and Mr T.)....
....and their British adversaries (Big Rich out of camera, Harpers, Daz, Big Al and Nick umpiring)...
So, the scene is set! The sun is high in the Spanish skies as the British riflemen, led by Captain Richard Fondleur, scout the edge of the town, accompanied by a force of jolly jack tars armed with a ferocious array of boarding mallets, billhooks and knives.
An alarum is raised by the Spanish Captain in the Tower, Fanciso de Rivera, and the lumbering behemoth of a 24 pounder cannon is trundled to face the attackers to landward.
As the Spanish defenders in the Tower make ready, the British riflemen skirmish with the enemy in the town outskirts, focusing their attack on a fortified hacienda.
The turn of the cards by Umpire Nick casts the net of fortune wide, with an ample selection of bonus cards for any Big Man to claim. A Marine landing party “grasp the nettle” with vigour, pressing into the centre of Palomba Blanca.
Meanwhile, quietly, secretively the French Consul, Colonel Daguerre makes his way, concealed from sight on “blinds”, to the docks with his chest of Spanish gold – destined not for the gilded halls of Madrid but for the salons of Revolutionary Paris.
Oblivious to Colonel Daguerre’s dark plans, the Spanish defenders of the town doggedly try and hold on, but are eventually routed from the hacienda...
.... and soon challenged by the jolly jack tars hacking down the main door of the Tower.
Desperately, the Spanish artillery commander, Don Hector Christo, orders his guns to fire across the bay on the British devils attacking the Tower, regardless of inflicting casualties on his own men. C’est magnifique, mais......well, sadly, you know the rest.
The Tower remains surrounded despite the withering artillery fire from across the bay...
...but help seems at hand with Sergeants Fraternité and Liberté and a platoon of French soldiers arriving in the market square...
....surely deliverance is near? Perhaps not that near, as with a collective groan from the British and Spanish players, Colonel Daguerre turns his loaded wagons along the dockside and commences loading the Vengeur, oblivious to the perils of his Spanish allies.
The Colonel must have a plan – he cannot simply be ignoring his allies in their of need, can he? Ah, mes braves .... war, well, it’s tricky. Nowhere near as simple as it seems. You know, there is this thing called strategy. It’s....how can I put it...complicated. Sometimes, it might seem that you're running out on your friends, but really, they just don’t know the whole picture...
As I mentioned, I sadly needed to leave at this point. Happily, the rest of the tale of treachery, bravery, wayward artillery and the lovely Marquesa Uma Paloma Blanca will shortly be published on the Lard Island Blog here.
Subscribe to:
Posts (Atom)