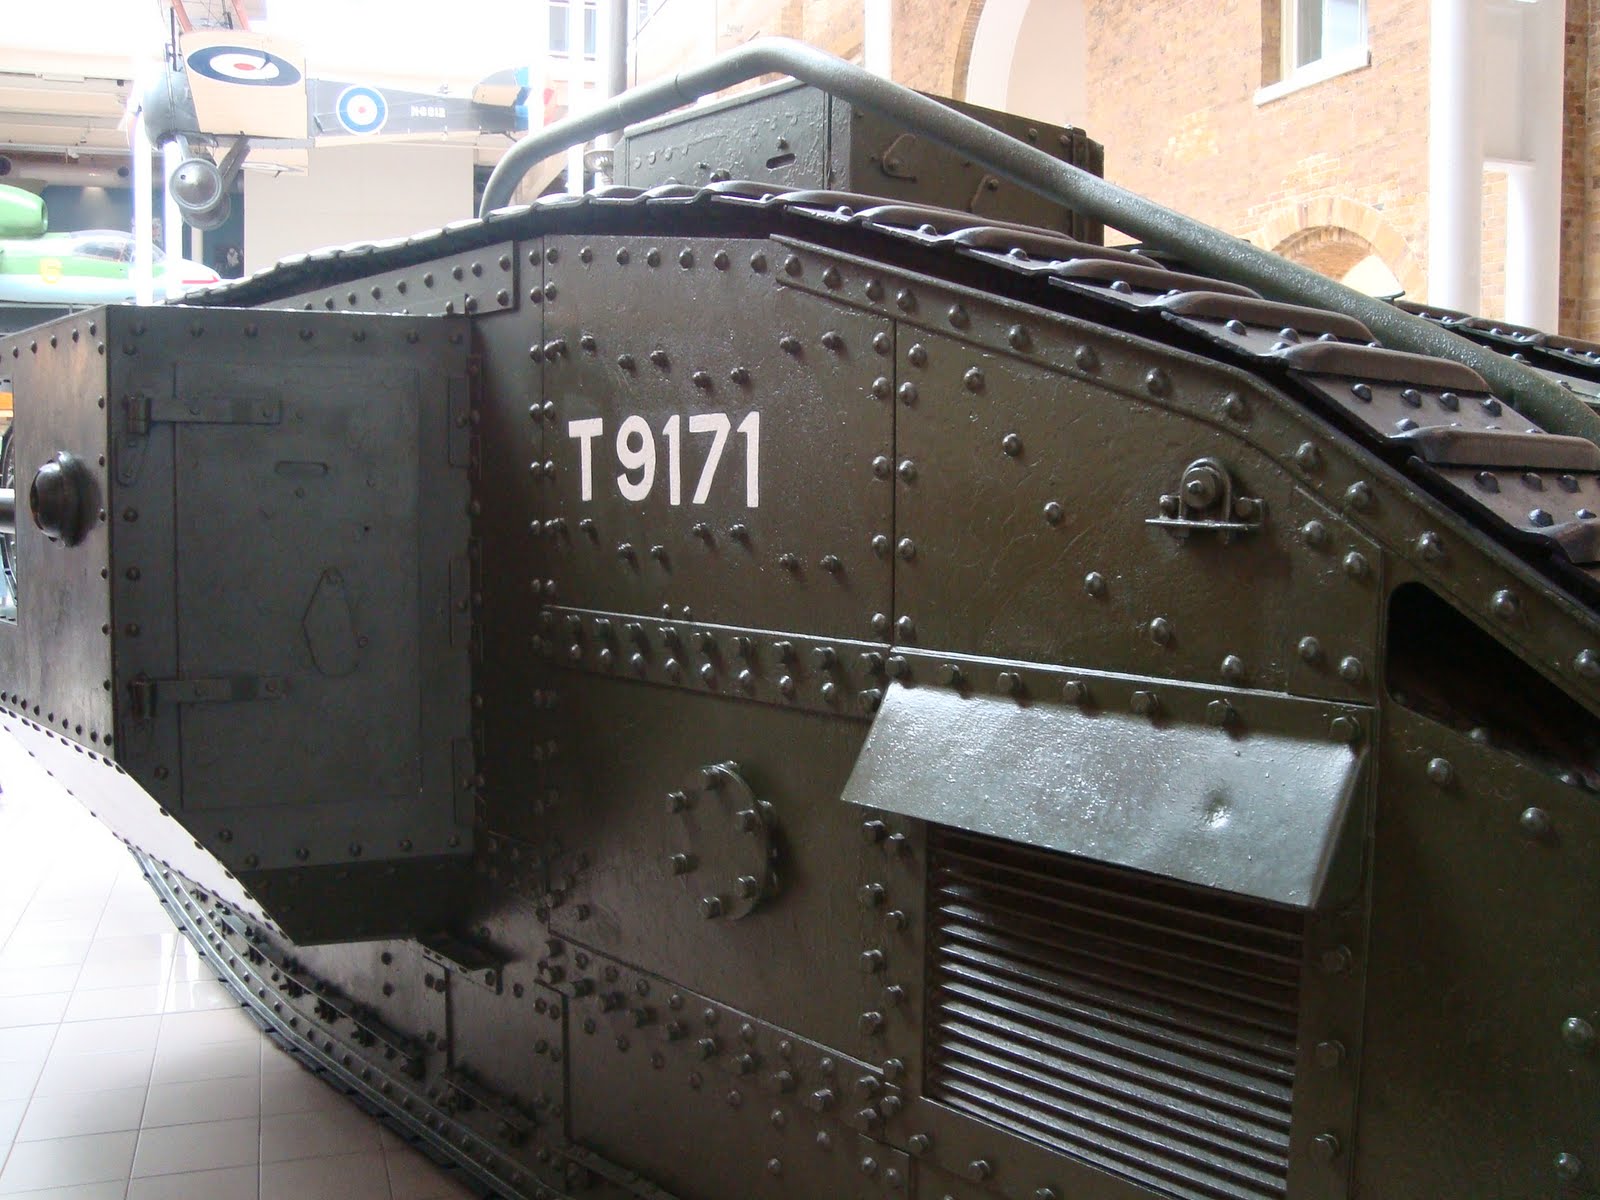
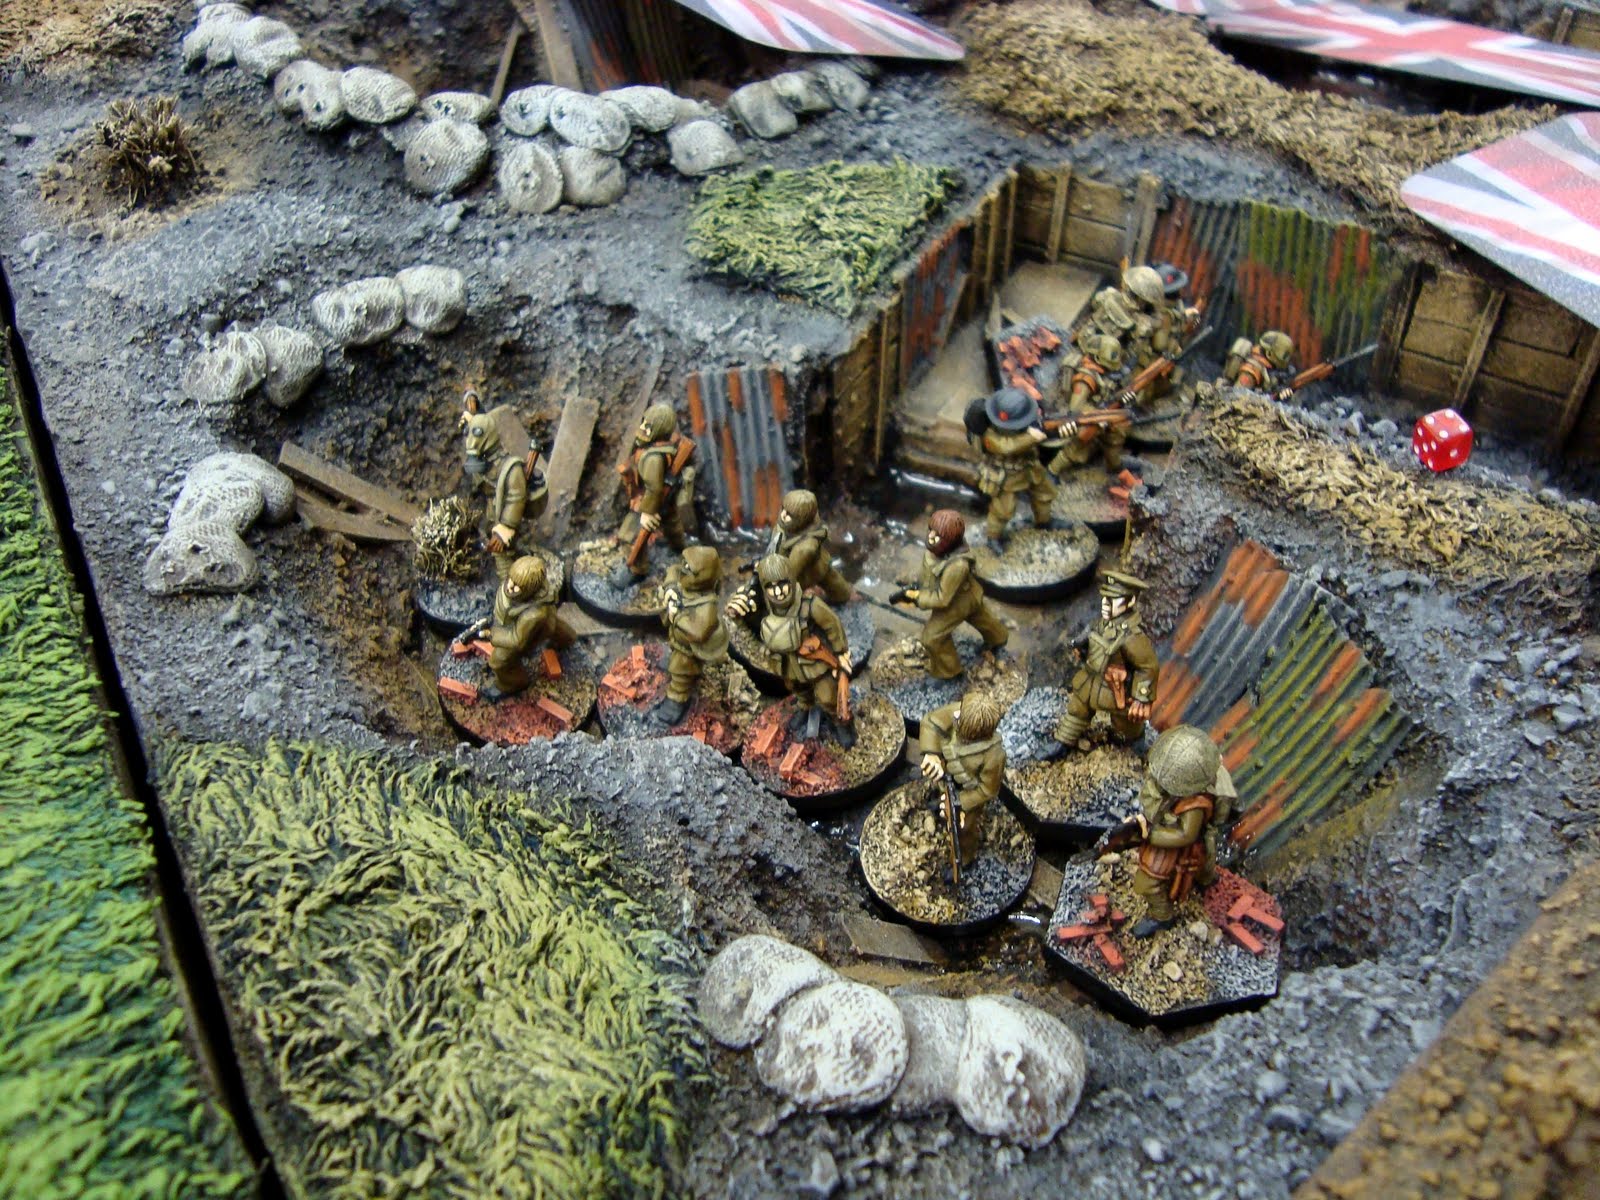
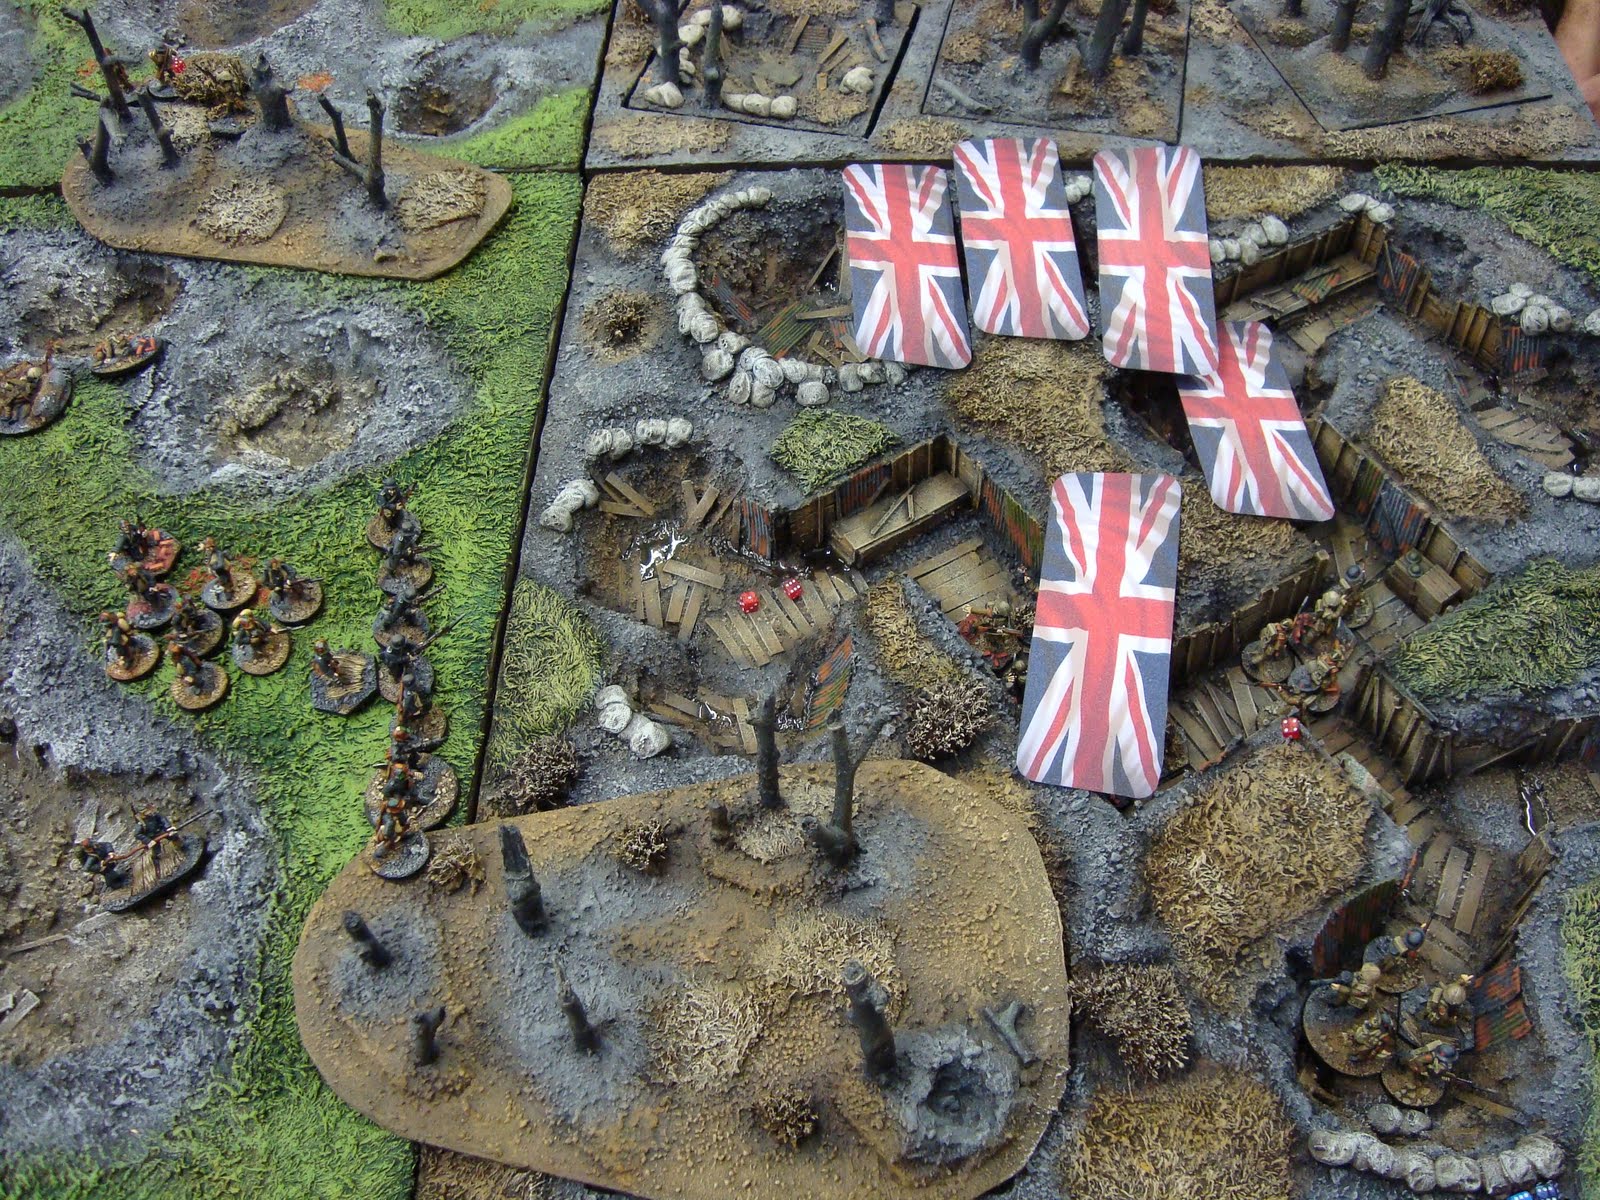
In December 2011, my local wargames club in St Albans played a mini-campaign set in the Ypres Salient in 1917. There were quite a few campaign emails between myself as the umpire and the players, and I promised to put these into a single document for anyone interested to have a look at.
I’ve posted the emails, and a short introduction, in the document entitled “Jetty Wood Campaign Diaries”, which is located on the right hand side of this blog under the heading Playtesting Scenarios and Campaign Diaries.
I’m sorry this has taken so long to appear on the blog, but hopefully something in the 31 pages will be of interest to someone out there!
I should add that there’s no real magic in the Jetty Wood Campaign Diaries. No silver bullet is provided for running successful campaigns. And no maxims are set out promising success. All I wanted to do was describe what we did, and some of the pros and cons of doing it our way.
Let me know what you think. Happy reading!
Showing posts with label Third Ypres and Passchendaele. Show all posts
Tuesday, 13 March 2012
Friday, 23 December 2011
"Passchendaele: the Bitter Victory" in the TooFatLardies Christmas Special 2011
A little bit of a blatant plug in this post, but I hope you’ll forgive me. For anyone wanting to know a little more about how my local wargames club went about wargaming Third Ypres and Passchendaele, I’ve written a couple of long-ish articles on the subject for the TooFatLardies Christmas Special 2011 which is published today by my good mates Richard Clarke and Nick Skinner.
The first article, “Passchendaele: the Bitter Victory” starts with looking at some of the challenges in attempting to recreate Third Ypres and Passchendaele through wargaming. I then try and cover the key themes of the campaign, including the evolution of small-unit tactics, the dominance of artillery, military technological developments which influenced the fighting and the critical factors of terrain and weather. The first article ends with the suggested “house rules” we have been working on for our games of “Through the Mud and the Blood” set in Third Ypres.
The second article, “In The Salient”, provides three scenarios. The first, "Gegenangriff", covers a German “spoiling attack” on hastily assembled British positions in late September 1917. The second, “Virtutis Gloria Merces”, follows the attack on Reutel village on 4 October 1917 in which Captain Clement Robertson of the Tank Corps was posthumously awarded the Victoria Cross. The third scenario, “A spot where only Devils can reign” recreates the Canadian attack on Vine Cottage to the north-west of Passchendaele village on 6 November 1917.
The other contents of the TooFatLardies Christmas Special 2011 are as follows:
The sinking of the Konigsberg. A classic scenario for Bag the Hun
On Patrol. A complete pre-game patrol system for I Ain't Been Shot Mum
A Brief Affair by Charles Eckart of Colorado. Australian troops attack a German held Pacific Island in 1914 with Mud & Blood
An A to Z of Umpiring. Nick Skinner runs through the dos and don'ts of running games.
One off Battles for Let Feu Sacre. Kev Lowth of Hampshire rolls up some scenarios for a quick game
Green Hill Moonshine. Chris Stoesen of Georgia presents this fun scenario for Terrible Sharp Sword.
Deadly Pairs. A Bag the Hun scenario for Normandy 1944.
Passchendaele: the Bitter Victory … errr … as mentioned above
In the Salient. Three Scenarios for gaming Passchendaele with "Through the Mud and the Blood".
6mm LOVES IABSM. Mark Luther of Atlanta tells us why he believes 6mm to be the perfect scale for IABSM
Across the Nemen. Mark puts his money where his mouth is with this great Barbarossa scenario.
Messing Around with Boats. Brian Wethersby of Texas presents his thoughts on rating ships for Kiss Me Hardy.
Operation Charnwood. Capturing Caen. Richard Clarke’s background to this remarkably little gamed operation.
A Fresh & Highly Trained Instrument A complete Operation Charnwood mini-campaign for I Ain't Been Shot Mum.
The Capture of Akhalkalak Fortress: Chris Stoesen presents this scenario for Sharp Practice set on the borders of Russia and the Ottoman Empire.
Tom Ballou of Massachusetts gives us some alternative sniper rules for IABSM.
Bridge over the River Urk. Robert Avery of No Fixed Abode heads to the Eastern Front with a Partisan scenario for IABSM.
“The Roundwood Report”. Some more interrogation of Richard Clarke about some of the TooFatLardies’ products by some bloke who has a Blog
Get Fondler. With news of his brother’s death at the hands of a criminal gang, Richard Fondler heads for Gateshead in this gritty Sharp Practice scenario. Avoid tall buildings!
May Madness. Nick Skinner is Tail End Charlie with this scenario for Bag the Hun above the Dunkirk perimeter in 1940. Tally Ho!
I hope you’ll agree that’s a fairly chunky amount of information for the cover price of £6. Although I’m clearly not an impartial judge of TooFatLardies’ publications, I do think it’s good value and since not a penny, cent or euro of the proceeds are heading to Roundwood Towers, I feel I can honestly and with a good conscience tell you to go and buy a copy!
Observant followers of the Blog may realise there's an overlap with the mini-campaign we played at the start of December. There is, but fear not. I hope to have the Campaign Diaries on this Blog at some point over the Christmas and New Year period, together with some other loose ends I've been meaning to finish off.
The first article, “Passchendaele: the Bitter Victory” starts with looking at some of the challenges in attempting to recreate Third Ypres and Passchendaele through wargaming. I then try and cover the key themes of the campaign, including the evolution of small-unit tactics, the dominance of artillery, military technological developments which influenced the fighting and the critical factors of terrain and weather. The first article ends with the suggested “house rules” we have been working on for our games of “Through the Mud and the Blood” set in Third Ypres.
The second article, “In The Salient”, provides three scenarios. The first, "Gegenangriff", covers a German “spoiling attack” on hastily assembled British positions in late September 1917. The second, “Virtutis Gloria Merces”, follows the attack on Reutel village on 4 October 1917 in which Captain Clement Robertson of the Tank Corps was posthumously awarded the Victoria Cross. The third scenario, “A spot where only Devils can reign” recreates the Canadian attack on Vine Cottage to the north-west of Passchendaele village on 6 November 1917.
The other contents of the TooFatLardies Christmas Special 2011 are as follows:
The sinking of the Konigsberg. A classic scenario for Bag the Hun
On Patrol. A complete pre-game patrol system for I Ain't Been Shot Mum
A Brief Affair by Charles Eckart of Colorado. Australian troops attack a German held Pacific Island in 1914 with Mud & Blood
An A to Z of Umpiring. Nick Skinner runs through the dos and don'ts of running games.
One off Battles for Let Feu Sacre. Kev Lowth of Hampshire rolls up some scenarios for a quick game
Green Hill Moonshine. Chris Stoesen of Georgia presents this fun scenario for Terrible Sharp Sword.
Deadly Pairs. A Bag the Hun scenario for Normandy 1944.
Passchendaele: the Bitter Victory … errr … as mentioned above
In the Salient. Three Scenarios for gaming Passchendaele with "Through the Mud and the Blood".
6mm LOVES IABSM. Mark Luther of Atlanta tells us why he believes 6mm to be the perfect scale for IABSM
Across the Nemen. Mark puts his money where his mouth is with this great Barbarossa scenario.
Messing Around with Boats. Brian Wethersby of Texas presents his thoughts on rating ships for Kiss Me Hardy.
Operation Charnwood. Capturing Caen. Richard Clarke’s background to this remarkably little gamed operation.
A Fresh & Highly Trained Instrument A complete Operation Charnwood mini-campaign for I Ain't Been Shot Mum.
The Capture of Akhalkalak Fortress: Chris Stoesen presents this scenario for Sharp Practice set on the borders of Russia and the Ottoman Empire.
Tom Ballou of Massachusetts gives us some alternative sniper rules for IABSM.
Bridge over the River Urk. Robert Avery of No Fixed Abode heads to the Eastern Front with a Partisan scenario for IABSM.
“The Roundwood Report”. Some more interrogation of Richard Clarke about some of the TooFatLardies’ products by some bloke who has a Blog
Get Fondler. With news of his brother’s death at the hands of a criminal gang, Richard Fondler heads for Gateshead in this gritty Sharp Practice scenario. Avoid tall buildings!
May Madness. Nick Skinner is Tail End Charlie with this scenario for Bag the Hun above the Dunkirk perimeter in 1940. Tally Ho!
I hope you’ll agree that’s a fairly chunky amount of information for the cover price of £6. Although I’m clearly not an impartial judge of TooFatLardies’ publications, I do think it’s good value and since not a penny, cent or euro of the proceeds are heading to Roundwood Towers, I feel I can honestly and with a good conscience tell you to go and buy a copy!
Observant followers of the Blog may realise there's an overlap with the mini-campaign we played at the start of December. There is, but fear not. I hope to have the Campaign Diaries on this Blog at some point over the Christmas and New Year period, together with some other loose ends I've been meaning to finish off.
Wednesday, 14 December 2011
"Scharnhorst" and "Gneisenau": A "Through the Mud and the Blood AAR" for Third Ypres, 4th October 1917
Last night, we played the second of our brace of games set in the Ypres Salient in the autumn of 1917.
As I mentioned in my last blog post, this game followed from a pre-game series of emails between the players in the game. The intention was for the decisions made by the players in the pre-game to influence the forces available and the tactics used by the German and British sides during the Tuesday night club wargame and also the precise terrain over which the game was to be fought.
The game played was the most promising of a number of encounters between the British 62 Brigade, part of 21 Division in the British Fourth Army, and the German 14th Reserve Infantry Regiment. The pre-game emails were focused on the British advance against German defences in depth in an area bounded by Jetty Wood to the North, and Juniper Wood and Juniper Cott to the South.
The Objectives
Being part of a pre-game sequence of emails, it was difficult to set the same fixed objectives as I would normally do in a scenario. Each player had stated in their emails what they wanted to achieve by the end of the mini-campaign, but translating that into hard objectives on the tabletop as slightly more challenging. I settled the objectives after discussion with the players – with the British objective being to navigate along the road from Polygon Wood to Reutel village (which ran across the North edge of the table, and for the Germans to prevent this happening).
The Terrain
The terrain over which Third Ypres was fought, and the changes to that terrain brought about by changing weather, was critical to the relative successes and failures of British operations in the Ypres Salient. In this context, the images of the flooded, shell-pocked terrain around Broodseinde, Zonnebeke and Passchendaele have become the signatures of the battle (even though at times during the Third Ypres battles large portions of the Salient were dry and dusty). It was therefore straightforward to mention to the players that their use of terrain, and navigation over the battlefield, would be key elements in the wargame.
The south of the table featured the edge of Juniper Wood, which petered out into a couple of isolated copses to the north. Alongside the eat edge of the wood was an artillery bunker, revealed in the first instance to the British players as simply being a reinforced shellhole. The reasoning here was that letters and post-war accounts by Tank Corps crewmen regarding concealed German artillery positions generally seem to have noted that a number of German field gun positions were practically invisible until the tank was very close indeed. I made the artillery Stellung accordingly difficult to spot for the British.
To the east of the table were two German MEBUs, or prefabricated concrete pillboxes. These were a typical feature of the German defences in the Ypres Salient. They proved historically to be a thorn in the side of attacking British and Imperial troops, necessitating a number of different tactics in order to neutralise them. The German player (Elton) has placed these carefully to provide mutual support on the campaign map, and they proved as venomous in the game as their historical counterparts had done. With a certain grim nod to the past, the northern pillbox was named “Scharnhorst”, the southern “Gneisenau”.
The terrain on the table was uniformly stated to be poor, requiring any movement to be at a -1 per pip of each movement dice. There was also the possibility of some of the terrain being abysmally bad, this being determined according to a random roll and reflecting the poor, rainy weather on the previous three days in the pre-game campaign.
The German player was also informed that prior to the start of the game, a creeping barrage had passed over his positions, dislocating his communications with his SOS artillery and causing some casualties in the pillboxes following several Stollenknicker, or large calibre dug-out smashing shells.
The British route of advance was equally testing. The road to Reutel was deemed to have been badly shelled by both sides in the previous days, and was negotiable only with great care. The road ran along the North of the table, but was difficult to follow for any British forces – especially if under fire. Crossing the short distance across the table, a mere 48”, would not be easy.
The Game
The British infantry from “A”Company, 1/Lincoln arrived slowly owing to being stretched out slightly along the road to Reutel (another requirement of a pre-game email from the British players). The first section to arrive occupied a small copse by Juniper Wood, closely followed by the first of a section of Mark IV tanks from “B” Battalion of the Tank Corps.
Black Prince II, a male Mark IV tank commanded by Captain The Honourable Roger Gustard-Woode, crawled cautiously onto the table, moving slowly along the road with its supporting infantry.
The pre-game emails had revealed Captain Gustard-Woode to be a most entertaining character. Here’s the description from Panda, the British Tank Corps commander:
“Captain The Honourable Roger Gustard-Woode is part of the landed gentry. His great grandfather had been influential in the development of corn thrashing machines, on the basis of which the family fortune was made. The Captain, like his father, took a keen interest in the workings of the farms and estate, and the introduction of machinery into the working day. It is for this reason he chose the tank instead of the lance, following his keen interest in farming machinery. A keen sportsman, Roger is often seen carrying a hockey stick, a hangover from his university days as First team captain. A rather social chap, his keenness to encourage a corps d’esprit amongst his men can sometimes take precedence over his other duties. However, Roger is rather hands on in terms of the technology at his disposal, and can happily spend hours talking and working alongside his engineers and crews, and often when other duties are to be attended to. Captain Gustard-Woode has chosen to spend time with his crew and their machines, tinkering with their new technology - sometimes to the annoyance of the engineers. In respect of extra equipment, the Captain recognises the importance of clear communications, and therefore has given orders for extra signalling equipment. Pigeons for signalling? No Sir, only for dinner!”
Eminently sensible, and characteristics which were reflected in the Captain’s performance with a couple of “house-rules”. These came in handy because no sooner had Black Prince II clanked its way onto the table than the German Blinds card was drawn, enabling the sharp eyes of Gefreiter Dieter Jaeger of 3rd Battery, 18th Bavarian Foot Artillery Battalion to drag the camouflage and scrim netting from his gun and strike the lumbering tank at long range. Firing his 77mm M1916 field gun after spending an action aiming, Gefreiter Jaeger’s first shot hit Black Prince II, shocking the driver and bringing the tank to a shuddering halt.
Stationary, Black Prince II started to slip into the Flanders mud. History repeated itself. “We travelled literally one foot to each revolution of the tracks”, recalled Second Lieutenant Wilfred Bion at Third Ypres. Panda and the other British players shared his experience and the tank bogged.
Immobile, with tracks revolving slowly into the mud, Black Prince II was a perfect target. Gefreiter Jaeger did not miss. The second shot smashed through the sponson, with Black Prince II catching fire, its crew scrambling out of the door hatch
Six of the eight crew, and Captain Gustard-Woode made the exit, gathering as an informal section by the now-blazing tank, thick black smoke enulfing the scene. One gunner had the presence of mind to drag out a spare Lewis gun from one of the sponsons before the fire engulfed the “bus”, and quickly deployed the weapon (somewhat ineffectually) against the Scharnhorst pillbox.
By now, British forces were streaming into the field. Brigand II, another male Mark IV tank commanded by First Lieutenant Charles Kimpton, rolled off the pavé road just avoiding Black Prince II and commenced firing with its 6pdr quick firing sponson mounted guns against Scharnhorst.
Its attack at long range was complimented by a swift attack off Blinds by another section of 1/Lincolns, this time with bombs at close range.
Keeping out of the arc of fire of a German maxim MG08 heavy machine gun in Gneisenau, the British bombers infiltrated to the rear of Scharnhorst and routed a defending section of German infantry guarding the entrances to the pill box.
With the Stellungbattalionkämpfer guards routed, the remaining bombers threw grenades into the rear of Scharnhorst. No quarter was asked, and none was given. As historically, the fighting had taken a bitter, cruel turn.
Gefreiter Hans Fassbinder, seeing the British bombers capturing Scharnhorst and frustrated by the narrow firing angle of Gneisenau’s embrasure, urged his crew to drag the Maxim heavy machine gun to the roof of the pillbox. The arc of fire was greater, and soon Gefreiter Fassbinder was directing withering fire against British forces on the north of the table.
The fire cut through both a British section and also the remaining crew of Black Prince II, but not before captain Gustard-Woode had gallantly rapped on the side of Brigand II with his hockey stick and demanded entrance to carry on the assault. He now led the remaining three tanks of his section, Brigand II which was now accompanied by two females – Belladonna and Banshee. More infantry was arriving, still in somewhat of a piecemeal fashion, as 1/Lincoln’s “A” Company headquarters deployed on the board together with First Lieutenant Percy Grantham.
By now the combined firepower of the “B” Battalion tanks was causing problems for the occupants of Gneisenau and also the artillery Stellung in the south of the board. Gefreiter Jaeger’s artillery crew has suffered two fatalities under Brigand II’s 6 pdr guns, with a strafing run by an RFC close support SE5 adding to the German discomfort.
While the German players attempted to rally their forces ….
… another British section waded through flooded shell-holes to pepper Gneisenau and it’s defenders with rifle grenades
As Captain Gustard-Woode rolled his tanks forward, even at one point navigating on foot before Brigand II, the German reinforcements arriving through Juniper Wood came too late.
Not even the presence of two high-quality German snipers, relocated by the German players from their reserves to the south of Juniper Wood, and the arrival of two additional sections of high quality trench cleaners under Major Ulrich von Bek, the local kampftruppenkommandeur, could stop the British forces getting close enough to an exit to call the morning’s attack for the British.
The Aftermath
So, there we have it. A larger, and more complicated, game than last weeks which I found much more challenging to umpire at a good pace. The duel between the tanks and artillery see-sawed dramatically in the two hours of the game. What seemed at first to be a withering fire by the German field artillery against stationary bogged-down British tanks son became a far more erratic sniping as crew casualties impaired the loading time and accuracy of Gefreiter Jaeger’s gun Bavarian crew.
The players seemed to feel that the pre-game emails had been worthwhile, and that they had set the scene for each of the games. This helped save time on the two nights we played, as well as helping to orientate players who were not very familiar with Third Ypres or the Great War in general.
Next, I hope to post up the pre-game/ mini-campaign emails and some notes for both the games. I always enjoy reading those sorts of things and I think from some of the previous comments that some of you may like that as well. Hopefully I can post them this coming weekend.
As I mentioned in my last blog post, this game followed from a pre-game series of emails between the players in the game. The intention was for the decisions made by the players in the pre-game to influence the forces available and the tactics used by the German and British sides during the Tuesday night club wargame and also the precise terrain over which the game was to be fought.
The game played was the most promising of a number of encounters between the British 62 Brigade, part of 21 Division in the British Fourth Army, and the German 14th Reserve Infantry Regiment. The pre-game emails were focused on the British advance against German defences in depth in an area bounded by Jetty Wood to the North, and Juniper Wood and Juniper Cott to the South.
The Objectives
Being part of a pre-game sequence of emails, it was difficult to set the same fixed objectives as I would normally do in a scenario. Each player had stated in their emails what they wanted to achieve by the end of the mini-campaign, but translating that into hard objectives on the tabletop as slightly more challenging. I settled the objectives after discussion with the players – with the British objective being to navigate along the road from Polygon Wood to Reutel village (which ran across the North edge of the table, and for the Germans to prevent this happening).
The Terrain
The terrain over which Third Ypres was fought, and the changes to that terrain brought about by changing weather, was critical to the relative successes and failures of British operations in the Ypres Salient. In this context, the images of the flooded, shell-pocked terrain around Broodseinde, Zonnebeke and Passchendaele have become the signatures of the battle (even though at times during the Third Ypres battles large portions of the Salient were dry and dusty). It was therefore straightforward to mention to the players that their use of terrain, and navigation over the battlefield, would be key elements in the wargame.
The south of the table featured the edge of Juniper Wood, which petered out into a couple of isolated copses to the north. Alongside the eat edge of the wood was an artillery bunker, revealed in the first instance to the British players as simply being a reinforced shellhole. The reasoning here was that letters and post-war accounts by Tank Corps crewmen regarding concealed German artillery positions generally seem to have noted that a number of German field gun positions were practically invisible until the tank was very close indeed. I made the artillery Stellung accordingly difficult to spot for the British.
To the east of the table were two German MEBUs, or prefabricated concrete pillboxes. These were a typical feature of the German defences in the Ypres Salient. They proved historically to be a thorn in the side of attacking British and Imperial troops, necessitating a number of different tactics in order to neutralise them. The German player (Elton) has placed these carefully to provide mutual support on the campaign map, and they proved as venomous in the game as their historical counterparts had done. With a certain grim nod to the past, the northern pillbox was named “Scharnhorst”, the southern “Gneisenau”.
The terrain on the table was uniformly stated to be poor, requiring any movement to be at a -1 per pip of each movement dice. There was also the possibility of some of the terrain being abysmally bad, this being determined according to a random roll and reflecting the poor, rainy weather on the previous three days in the pre-game campaign.
The German player was also informed that prior to the start of the game, a creeping barrage had passed over his positions, dislocating his communications with his SOS artillery and causing some casualties in the pillboxes following several Stollenknicker, or large calibre dug-out smashing shells.
The British route of advance was equally testing. The road to Reutel was deemed to have been badly shelled by both sides in the previous days, and was negotiable only with great care. The road ran along the North of the table, but was difficult to follow for any British forces – especially if under fire. Crossing the short distance across the table, a mere 48”, would not be easy.
The Game
The British infantry from “A”Company, 1/Lincoln arrived slowly owing to being stretched out slightly along the road to Reutel (another requirement of a pre-game email from the British players). The first section to arrive occupied a small copse by Juniper Wood, closely followed by the first of a section of Mark IV tanks from “B” Battalion of the Tank Corps.
Black Prince II, a male Mark IV tank commanded by Captain The Honourable Roger Gustard-Woode, crawled cautiously onto the table, moving slowly along the road with its supporting infantry.
The pre-game emails had revealed Captain Gustard-Woode to be a most entertaining character. Here’s the description from Panda, the British Tank Corps commander:
“Captain The Honourable Roger Gustard-Woode is part of the landed gentry. His great grandfather had been influential in the development of corn thrashing machines, on the basis of which the family fortune was made. The Captain, like his father, took a keen interest in the workings of the farms and estate, and the introduction of machinery into the working day. It is for this reason he chose the tank instead of the lance, following his keen interest in farming machinery. A keen sportsman, Roger is often seen carrying a hockey stick, a hangover from his university days as First team captain. A rather social chap, his keenness to encourage a corps d’esprit amongst his men can sometimes take precedence over his other duties. However, Roger is rather hands on in terms of the technology at his disposal, and can happily spend hours talking and working alongside his engineers and crews, and often when other duties are to be attended to. Captain Gustard-Woode has chosen to spend time with his crew and their machines, tinkering with their new technology - sometimes to the annoyance of the engineers. In respect of extra equipment, the Captain recognises the importance of clear communications, and therefore has given orders for extra signalling equipment. Pigeons for signalling? No Sir, only for dinner!”
Eminently sensible, and characteristics which were reflected in the Captain’s performance with a couple of “house-rules”. These came in handy because no sooner had Black Prince II clanked its way onto the table than the German Blinds card was drawn, enabling the sharp eyes of Gefreiter Dieter Jaeger of 3rd Battery, 18th Bavarian Foot Artillery Battalion to drag the camouflage and scrim netting from his gun and strike the lumbering tank at long range. Firing his 77mm M1916 field gun after spending an action aiming, Gefreiter Jaeger’s first shot hit Black Prince II, shocking the driver and bringing the tank to a shuddering halt.
Stationary, Black Prince II started to slip into the Flanders mud. History repeated itself. “We travelled literally one foot to each revolution of the tracks”, recalled Second Lieutenant Wilfred Bion at Third Ypres. Panda and the other British players shared his experience and the tank bogged.
Immobile, with tracks revolving slowly into the mud, Black Prince II was a perfect target. Gefreiter Jaeger did not miss. The second shot smashed through the sponson, with Black Prince II catching fire, its crew scrambling out of the door hatch
Six of the eight crew, and Captain Gustard-Woode made the exit, gathering as an informal section by the now-blazing tank, thick black smoke enulfing the scene. One gunner had the presence of mind to drag out a spare Lewis gun from one of the sponsons before the fire engulfed the “bus”, and quickly deployed the weapon (somewhat ineffectually) against the Scharnhorst pillbox.
By now, British forces were streaming into the field. Brigand II, another male Mark IV tank commanded by First Lieutenant Charles Kimpton, rolled off the pavé road just avoiding Black Prince II and commenced firing with its 6pdr quick firing sponson mounted guns against Scharnhorst.
Its attack at long range was complimented by a swift attack off Blinds by another section of 1/Lincolns, this time with bombs at close range.
Keeping out of the arc of fire of a German maxim MG08 heavy machine gun in Gneisenau, the British bombers infiltrated to the rear of Scharnhorst and routed a defending section of German infantry guarding the entrances to the pill box.
With the Stellungbattalionkämpfer guards routed, the remaining bombers threw grenades into the rear of Scharnhorst. No quarter was asked, and none was given. As historically, the fighting had taken a bitter, cruel turn.
Gefreiter Hans Fassbinder, seeing the British bombers capturing Scharnhorst and frustrated by the narrow firing angle of Gneisenau’s embrasure, urged his crew to drag the Maxim heavy machine gun to the roof of the pillbox. The arc of fire was greater, and soon Gefreiter Fassbinder was directing withering fire against British forces on the north of the table.
The fire cut through both a British section and also the remaining crew of Black Prince II, but not before captain Gustard-Woode had gallantly rapped on the side of Brigand II with his hockey stick and demanded entrance to carry on the assault. He now led the remaining three tanks of his section, Brigand II which was now accompanied by two females – Belladonna and Banshee. More infantry was arriving, still in somewhat of a piecemeal fashion, as 1/Lincoln’s “A” Company headquarters deployed on the board together with First Lieutenant Percy Grantham.
By now the combined firepower of the “B” Battalion tanks was causing problems for the occupants of Gneisenau and also the artillery Stellung in the south of the board. Gefreiter Jaeger’s artillery crew has suffered two fatalities under Brigand II’s 6 pdr guns, with a strafing run by an RFC close support SE5 adding to the German discomfort.
While the German players attempted to rally their forces ….
… another British section waded through flooded shell-holes to pepper Gneisenau and it’s defenders with rifle grenades
As Captain Gustard-Woode rolled his tanks forward, even at one point navigating on foot before Brigand II, the German reinforcements arriving through Juniper Wood came too late.
Not even the presence of two high-quality German snipers, relocated by the German players from their reserves to the south of Juniper Wood, and the arrival of two additional sections of high quality trench cleaners under Major Ulrich von Bek, the local kampftruppenkommandeur, could stop the British forces getting close enough to an exit to call the morning’s attack for the British.
The Aftermath
So, there we have it. A larger, and more complicated, game than last weeks which I found much more challenging to umpire at a good pace. The duel between the tanks and artillery see-sawed dramatically in the two hours of the game. What seemed at first to be a withering fire by the German field artillery against stationary bogged-down British tanks son became a far more erratic sniping as crew casualties impaired the loading time and accuracy of Gefreiter Jaeger’s gun Bavarian crew.
The players seemed to feel that the pre-game emails had been worthwhile, and that they had set the scene for each of the games. This helped save time on the two nights we played, as well as helping to orientate players who were not very familiar with Third Ypres or the Great War in general.
Next, I hope to post up the pre-game/ mini-campaign emails and some notes for both the games. I always enjoy reading those sorts of things and I think from some of the previous comments that some of you may like that as well. Hopefully I can post them this coming weekend.
Thursday, 8 December 2011
Polygon Wood, 2nd October 1917: A "Through the Mud and the Blood" After Action Report
On Tuesday night, we played through the first of a brace of games set in and around Polygon Wood in the Ypres Salient in early October 1917.
For a while I‘ve been thinking of ways in which to add a bit more background and context to the evening games I play at my local wargames club in St Albans. I was hoping to immerse the players a little more into the history behind the games and develop further the themes which seem to me to be characteristic of the Third Battle of Ypres: immense battles, difficult and even abysmal terrain, dominant artillery, rapidly evolving tactics and weather.
In Blog posts later this month I’ll describe in more detail the way I went about trying to create this background through a series of pre-game emails sent to the players, each of which was focused on different levels of command. On replying to these emails, the decisions made by the players then influenced the forces available and the artillery tactics used by the German and British sides during the Tuesday night club wargame and also the precise terrain over which the game was to be fought.
If people are interested, I’d also be happy to post the full umpire’s notes for the mini-campaign, and also the email exchanges and game briefings once we’ve played the final game on Tuesday 13th December.
Enough of future plans, and on with the action from the first of the two games…
The German Objectives
The game featured a German spoiling attack on British positions on the east side of Polygon Wood. The German commander (Elton) had been told by email that his forces had been pushed out of Polygon Wood in late September 1917, retreating to the east in the face of a colossal “bite and hold” operation by the Australian Divisions within the British Second Army. Casualties amongst the German defenders had been heavy. It was imperative that the remaining German forces prevented further British advances which could threaten the Gheluvelt Plateau, Broodseinde Ridge and further eastwards towards railheads at Roulers and the captured Channel ports of Ostend and Zeebrugge.
The German commander had, by email, chosen to forestall the next British attack by launching a series of spoiling attacks on the British and Imperial forces reforming in Polygon Wood. His tactics, while aggressive, we completely in line with the summary prepared by the German Fourth Army in late September 1917 of how the rest of the Flandernschlact should be fought:
“In order to wear down and destroy the enemy [British] infantry in the same way as the enemy attempts to do to our infantry, there is to be an increased concentration on the engagement of the enemy infantry. Most of the field artillery is to be used I this way…..Large amounts of gas [shells] are to be used against enemy [battery] positions and the enemy forward battle zone. Army headquarters will issue orders separately for these “Major Gas Engagements”. Each of the Groups will also direct smaller scale gas shoots against the infantry whenever the wind is favourable. Extensive use is to be made of gas-filled mortar bombs…we have to force the enemy, therefore, constantly to maintain larger forces in their forward battle zone and to place their reserves further forward, so that our artillery has worthwhile infantry targets to engage. This can only be done if we launch attacks ourselves, preferably during the intervals between their attacks, so that we can disrupt their plans. This will force the enemy, if they are to be able to hold on to the ground which they have won, to launch costly counter-attacks against which we can deploy maximum firepower” (“The German Army at Passchendaele”, Jack Sheldon, pp 186-188)
The Terrain, the Weather and the Opposing Forces
I warned the players that they should consider the whole of the board to be covered with the stumps of shell shattered trees.
Lieutenant Cyril Lawrence described the appearance of the wood after the battles of August 1917:
“on our left, the shattered remains of Polygon Wood – gone – absolutely wiped out – simply a mass of huge splintered trunks and matchwood lying everywhere. In front, two or three pill boxes stand up like warts … and everywhere, everywhere the sea of great shell holes, lip to lip – not a trace of grass, of the forms of the hedges or the fields remains – just one heaved up mass of turned up earth”.
I randomly allocated movement penalties to each terrain board as everything I’d read about Polygon Wood in early October 1917 seemed to suggest it was an exhausting, challenging place to move or deploy through. I randomly determined the weather (light rain and mist) and the scene was set for a dawn attack by Germans Stosstruppen on the British lines.
The German Commander had access to a depleted company of Stosstruppen from 3rd Battalion, 229th Reserve Infantry Regiment, led by Fahnrich Joachim Vogel. This unit had historically been in action in an earlier spoiling attack in Polygon Wood on 23 September 1917. While it had suffered casualties, I reasoned it would still (just) be a first-rate fighting unit, albeit with its fighting value significantly depleted. To reflect the quality of troops and leadership of this formation, the German players on the night (Richard and Elton) were given a “German Dynamic Commander” card and two “Sturmabteilung Vor!” cards. In the end, these cards were to be crucial. I also gave Fahnrich Joachim Vogel a devil’s luck card, thematically entitled (in my dodgy German) “das Glück des Teufels”.
Opposing them were Major Jasper Whitechapel of “A” Company of 1/Middlesex with a small force of exhausted troops ready for relief from the front line. The last couple of days had been extremely difficult for this formation, with constant German shelling both along the line and across the rear areas of the battalion (the latter resulting from the German Commander’s email instructions focusing on artillery interdiction on British rear areas and supporting formations). Accordingly, the formation was barely more than half strength. Despite this, Major Whitechapel’s orders were to hold his Company headquarters position at all costs.
The British players were told that “A” Company of 1/Middlesex were due to be relieved by First Lieutenant Jackie Shearer of 2nd Platoon, “B” Company, 12/13 Northumberland Fusiliers, part of 62nd Brigade, 21st Division which would be taking its position for the forthcoming offensive. Once the German Stosstruppen commenced their spoiling attack, would the Northumberland Fusiliers arrive in time?
The Game
The game opened with a vicious fight between the lead assault sections of the Stosstruppen force, led by the dynamic Fahnrich Joachim Vogel and Feldwebel Max Schrek and the most advanced section of the 1/Middlesex.
Despite the ground in the first terrain board being determined as abysmal, and substantially retarding German movement, the shock and surprise of the Stosstruppen engaging the lead British rifle section in close combat was devastating. The remnants of the first British section withdrew in disorder as German artillery started to flay the British base terrain boards and rear areas.
While German movement was slowed by the abysmal terrain and some very poor movement dice rolls, the presence of a “German Dynamic Commander” card and two “Sturmabteilung Vor!” cards managed to drive the Stosstruppen forward.
Two German Granatenwerfer 16s added to the onslaught, peppering the British defenders with grenades whenever they appeared, directed by German front line troops shouting back locations to which their “pigeons” could be aimed.
A British Lewis gun section threatened to stem the assault, but Fahnrich Joachim Vogel continued to drive his men forward in repeated close assaults. The “trench brooms” of the lead Stosstruppen section (automatic C96 Mausers and Luger machine pistols with snail magazines), supplemented by a number Stosstruppen with bayonets and trench knives, clawed through the British defending sections, although at a cost.
By now the German forces had broken into the second terrain board, and found the going slightly better. More of the German Blinds were moved forward, allowing fresh German sections to fight off a flank attack by a section of British bombers as the struggle became more desperate on both sides.
By now the German artillery bombardment had lifted. The German artillery strikes had succeeded in killing all of the 1/ Middlesex’s Company headquarters section except for Major Whitechapel who seemed to be living a charmed life. Importantly, the British forward artillery liaison subaltern had been killed and his telephone cables to British SOS artillery batteries were now severed. (I let the British players know at the end of the game that the German Commander had, by email, informed me that his artillery forces would concentrate on counter-battery fire during the assault as well as bombarding British rear areas.) Major Whitechapel’s frantic signalling with the artillery liaison flags (collected, bloodstained, from a dying signaller's hands) was to no avail. On this part of the battlefield, the British SOS artillery barrage never arrived.
However, the German barrage had been too short in duration to catch the leading platoon of the 12/13 Northumberland Fusiliers as they made their exhausting progress through the ruins of Polygon Wood. Halfway through the game, the first sections of the Northumberland Fusiliers' lead platoon could be seen advancing onto the British baseline.
Spurred by the sight of fresh British blinds appearing on the table as the early morning mist dissipated, the Germans pressed their attack with renewed force. Support and inspiration came in the form of a Hannover CL.III from SchlactStaffeln 21, flying at less than 100 feet, strafing the already shocked British troops and with the observer shouting encouragement to the advancing Stosstruppen.
Despite the aerial support, Fahnrich Vogel was leading a much diminished force forward. The troops of his leading assault sections had been either killed or shocked in the remorseless attack through Polygon Wood on the British positions. He had one last card to play. He ordered up a two-man flammenwerfer to lead the final assault into a half-flooded broken entrenched position where he suspected the British Company headquarters was located. As the German players swiftly advanced the flammenwerfer on a Blind with judicious use of the two “Sturmabteilung Vor!” cards, the first of the sections of Lieutenant Shearer’s platoon from “B” Company, 12/13 Northumberland Fusiliers had made its way forward to face the Stosstruppen.
The club fell silent as Richard rolled the dice for the effect of the German flammenwerfer’s attack. With two searing darts of flame, the flammenwerfer turned the British position into an inferno of burning destruction, the shock effect of the nightmarish attack only too apparent as the Geordies recoiled back in horror.
Dredging the last of his force forward Fahnrich Vogel prepared to assault the final British position. He was sure he could see Major Whitechapel still frantically flapping his signalling flags to attract attention of anyone with a field telephone to call down SOS fire.
Everything rested on the turn of the cards.
In the end, it was the British Blinds card which trumped the various cards in the Stosstruppen deck which would have propelled the remnants of Fahnrich Vogel’s brave force into the British positions. With ample additional sections of the Northumberland Fusiliers arriving on the table, the German players decided that the spoiling attack had done enough … just.
The Aftermath
So, a tense, unpredictable and intermittently horrifying game found over the shattered ruins of Polygon Wood drew to an end. Played in a great spirit, I’m hopeful that the pre-game emails helped to deepen the context of the game for the players and provide an insight (however small) into the desperate conditions of the fighting in and around Polygon Wood in August and September 1917.
I’ll post the game briefings which I provided to the players over the next day or so. These contain some notes about a number of elements in the game, including British battlefield fatigue (affecting the 12/13 Northumberland Fusiliers as they battled forward from the British rear lines, the working (or not) of the British SOS fire.
I’ll Blog the second of the two games next week, after we’ve played it.
For a while I‘ve been thinking of ways in which to add a bit more background and context to the evening games I play at my local wargames club in St Albans. I was hoping to immerse the players a little more into the history behind the games and develop further the themes which seem to me to be characteristic of the Third Battle of Ypres: immense battles, difficult and even abysmal terrain, dominant artillery, rapidly evolving tactics and weather.
In Blog posts later this month I’ll describe in more detail the way I went about trying to create this background through a series of pre-game emails sent to the players, each of which was focused on different levels of command. On replying to these emails, the decisions made by the players then influenced the forces available and the artillery tactics used by the German and British sides during the Tuesday night club wargame and also the precise terrain over which the game was to be fought.
If people are interested, I’d also be happy to post the full umpire’s notes for the mini-campaign, and also the email exchanges and game briefings once we’ve played the final game on Tuesday 13th December.
Enough of future plans, and on with the action from the first of the two games…
The German Objectives
The game featured a German spoiling attack on British positions on the east side of Polygon Wood. The German commander (Elton) had been told by email that his forces had been pushed out of Polygon Wood in late September 1917, retreating to the east in the face of a colossal “bite and hold” operation by the Australian Divisions within the British Second Army. Casualties amongst the German defenders had been heavy. It was imperative that the remaining German forces prevented further British advances which could threaten the Gheluvelt Plateau, Broodseinde Ridge and further eastwards towards railheads at Roulers and the captured Channel ports of Ostend and Zeebrugge.
The German commander had, by email, chosen to forestall the next British attack by launching a series of spoiling attacks on the British and Imperial forces reforming in Polygon Wood. His tactics, while aggressive, we completely in line with the summary prepared by the German Fourth Army in late September 1917 of how the rest of the Flandernschlact should be fought:
“In order to wear down and destroy the enemy [British] infantry in the same way as the enemy attempts to do to our infantry, there is to be an increased concentration on the engagement of the enemy infantry. Most of the field artillery is to be used I this way…..Large amounts of gas [shells] are to be used against enemy [battery] positions and the enemy forward battle zone. Army headquarters will issue orders separately for these “Major Gas Engagements”. Each of the Groups will also direct smaller scale gas shoots against the infantry whenever the wind is favourable. Extensive use is to be made of gas-filled mortar bombs…we have to force the enemy, therefore, constantly to maintain larger forces in their forward battle zone and to place their reserves further forward, so that our artillery has worthwhile infantry targets to engage. This can only be done if we launch attacks ourselves, preferably during the intervals between their attacks, so that we can disrupt their plans. This will force the enemy, if they are to be able to hold on to the ground which they have won, to launch costly counter-attacks against which we can deploy maximum firepower” (“The German Army at Passchendaele”, Jack Sheldon, pp 186-188)
The Terrain, the Weather and the Opposing Forces
I warned the players that they should consider the whole of the board to be covered with the stumps of shell shattered trees.
Lieutenant Cyril Lawrence described the appearance of the wood after the battles of August 1917:
“on our left, the shattered remains of Polygon Wood – gone – absolutely wiped out – simply a mass of huge splintered trunks and matchwood lying everywhere. In front, two or three pill boxes stand up like warts … and everywhere, everywhere the sea of great shell holes, lip to lip – not a trace of grass, of the forms of the hedges or the fields remains – just one heaved up mass of turned up earth”.
I randomly allocated movement penalties to each terrain board as everything I’d read about Polygon Wood in early October 1917 seemed to suggest it was an exhausting, challenging place to move or deploy through. I randomly determined the weather (light rain and mist) and the scene was set for a dawn attack by Germans Stosstruppen on the British lines.
The German Commander had access to a depleted company of Stosstruppen from 3rd Battalion, 229th Reserve Infantry Regiment, led by Fahnrich Joachim Vogel. This unit had historically been in action in an earlier spoiling attack in Polygon Wood on 23 September 1917. While it had suffered casualties, I reasoned it would still (just) be a first-rate fighting unit, albeit with its fighting value significantly depleted. To reflect the quality of troops and leadership of this formation, the German players on the night (Richard and Elton) were given a “German Dynamic Commander” card and two “Sturmabteilung Vor!” cards. In the end, these cards were to be crucial. I also gave Fahnrich Joachim Vogel a devil’s luck card, thematically entitled (in my dodgy German) “das Glück des Teufels”.
Opposing them were Major Jasper Whitechapel of “A” Company of 1/Middlesex with a small force of exhausted troops ready for relief from the front line. The last couple of days had been extremely difficult for this formation, with constant German shelling both along the line and across the rear areas of the battalion (the latter resulting from the German Commander’s email instructions focusing on artillery interdiction on British rear areas and supporting formations). Accordingly, the formation was barely more than half strength. Despite this, Major Whitechapel’s orders were to hold his Company headquarters position at all costs.
The British players were told that “A” Company of 1/Middlesex were due to be relieved by First Lieutenant Jackie Shearer of 2nd Platoon, “B” Company, 12/13 Northumberland Fusiliers, part of 62nd Brigade, 21st Division which would be taking its position for the forthcoming offensive. Once the German Stosstruppen commenced their spoiling attack, would the Northumberland Fusiliers arrive in time?
The Game
The game opened with a vicious fight between the lead assault sections of the Stosstruppen force, led by the dynamic Fahnrich Joachim Vogel and Feldwebel Max Schrek and the most advanced section of the 1/Middlesex.
Despite the ground in the first terrain board being determined as abysmal, and substantially retarding German movement, the shock and surprise of the Stosstruppen engaging the lead British rifle section in close combat was devastating. The remnants of the first British section withdrew in disorder as German artillery started to flay the British base terrain boards and rear areas.
While German movement was slowed by the abysmal terrain and some very poor movement dice rolls, the presence of a “German Dynamic Commander” card and two “Sturmabteilung Vor!” cards managed to drive the Stosstruppen forward.
Two German Granatenwerfer 16s added to the onslaught, peppering the British defenders with grenades whenever they appeared, directed by German front line troops shouting back locations to which their “pigeons” could be aimed.
A British Lewis gun section threatened to stem the assault, but Fahnrich Joachim Vogel continued to drive his men forward in repeated close assaults. The “trench brooms” of the lead Stosstruppen section (automatic C96 Mausers and Luger machine pistols with snail magazines), supplemented by a number Stosstruppen with bayonets and trench knives, clawed through the British defending sections, although at a cost.
By now the German forces had broken into the second terrain board, and found the going slightly better. More of the German Blinds were moved forward, allowing fresh German sections to fight off a flank attack by a section of British bombers as the struggle became more desperate on both sides.
By now the German artillery bombardment had lifted. The German artillery strikes had succeeded in killing all of the 1/ Middlesex’s Company headquarters section except for Major Whitechapel who seemed to be living a charmed life. Importantly, the British forward artillery liaison subaltern had been killed and his telephone cables to British SOS artillery batteries were now severed. (I let the British players know at the end of the game that the German Commander had, by email, informed me that his artillery forces would concentrate on counter-battery fire during the assault as well as bombarding British rear areas.) Major Whitechapel’s frantic signalling with the artillery liaison flags (collected, bloodstained, from a dying signaller's hands) was to no avail. On this part of the battlefield, the British SOS artillery barrage never arrived.
However, the German barrage had been too short in duration to catch the leading platoon of the 12/13 Northumberland Fusiliers as they made their exhausting progress through the ruins of Polygon Wood. Halfway through the game, the first sections of the Northumberland Fusiliers' lead platoon could be seen advancing onto the British baseline.
Spurred by the sight of fresh British blinds appearing on the table as the early morning mist dissipated, the Germans pressed their attack with renewed force. Support and inspiration came in the form of a Hannover CL.III from SchlactStaffeln 21, flying at less than 100 feet, strafing the already shocked British troops and with the observer shouting encouragement to the advancing Stosstruppen.
Despite the aerial support, Fahnrich Vogel was leading a much diminished force forward. The troops of his leading assault sections had been either killed or shocked in the remorseless attack through Polygon Wood on the British positions. He had one last card to play. He ordered up a two-man flammenwerfer to lead the final assault into a half-flooded broken entrenched position where he suspected the British Company headquarters was located. As the German players swiftly advanced the flammenwerfer on a Blind with judicious use of the two “Sturmabteilung Vor!” cards, the first of the sections of Lieutenant Shearer’s platoon from “B” Company, 12/13 Northumberland Fusiliers had made its way forward to face the Stosstruppen.
The club fell silent as Richard rolled the dice for the effect of the German flammenwerfer’s attack. With two searing darts of flame, the flammenwerfer turned the British position into an inferno of burning destruction, the shock effect of the nightmarish attack only too apparent as the Geordies recoiled back in horror.
Dredging the last of his force forward Fahnrich Vogel prepared to assault the final British position. He was sure he could see Major Whitechapel still frantically flapping his signalling flags to attract attention of anyone with a field telephone to call down SOS fire.
Everything rested on the turn of the cards.
In the end, it was the British Blinds card which trumped the various cards in the Stosstruppen deck which would have propelled the remnants of Fahnrich Vogel’s brave force into the British positions. With ample additional sections of the Northumberland Fusiliers arriving on the table, the German players decided that the spoiling attack had done enough … just.
The Aftermath
So, a tense, unpredictable and intermittently horrifying game found over the shattered ruins of Polygon Wood drew to an end. Played in a great spirit, I’m hopeful that the pre-game emails helped to deepen the context of the game for the players and provide an insight (however small) into the desperate conditions of the fighting in and around Polygon Wood in August and September 1917.
I’ll post the game briefings which I provided to the players over the next day or so. These contain some notes about a number of elements in the game, including British battlefield fatigue (affecting the 12/13 Northumberland Fusiliers as they battled forward from the British rear lines, the working (or not) of the British SOS fire.
I’ll Blog the second of the two games next week, after we’ve played it.
Subscribe to:
Posts (Atom)