Showing posts with label Siegfried Stellung. Show all posts

Tuesday, 11 December 2012

One project ends….another (almost) begins


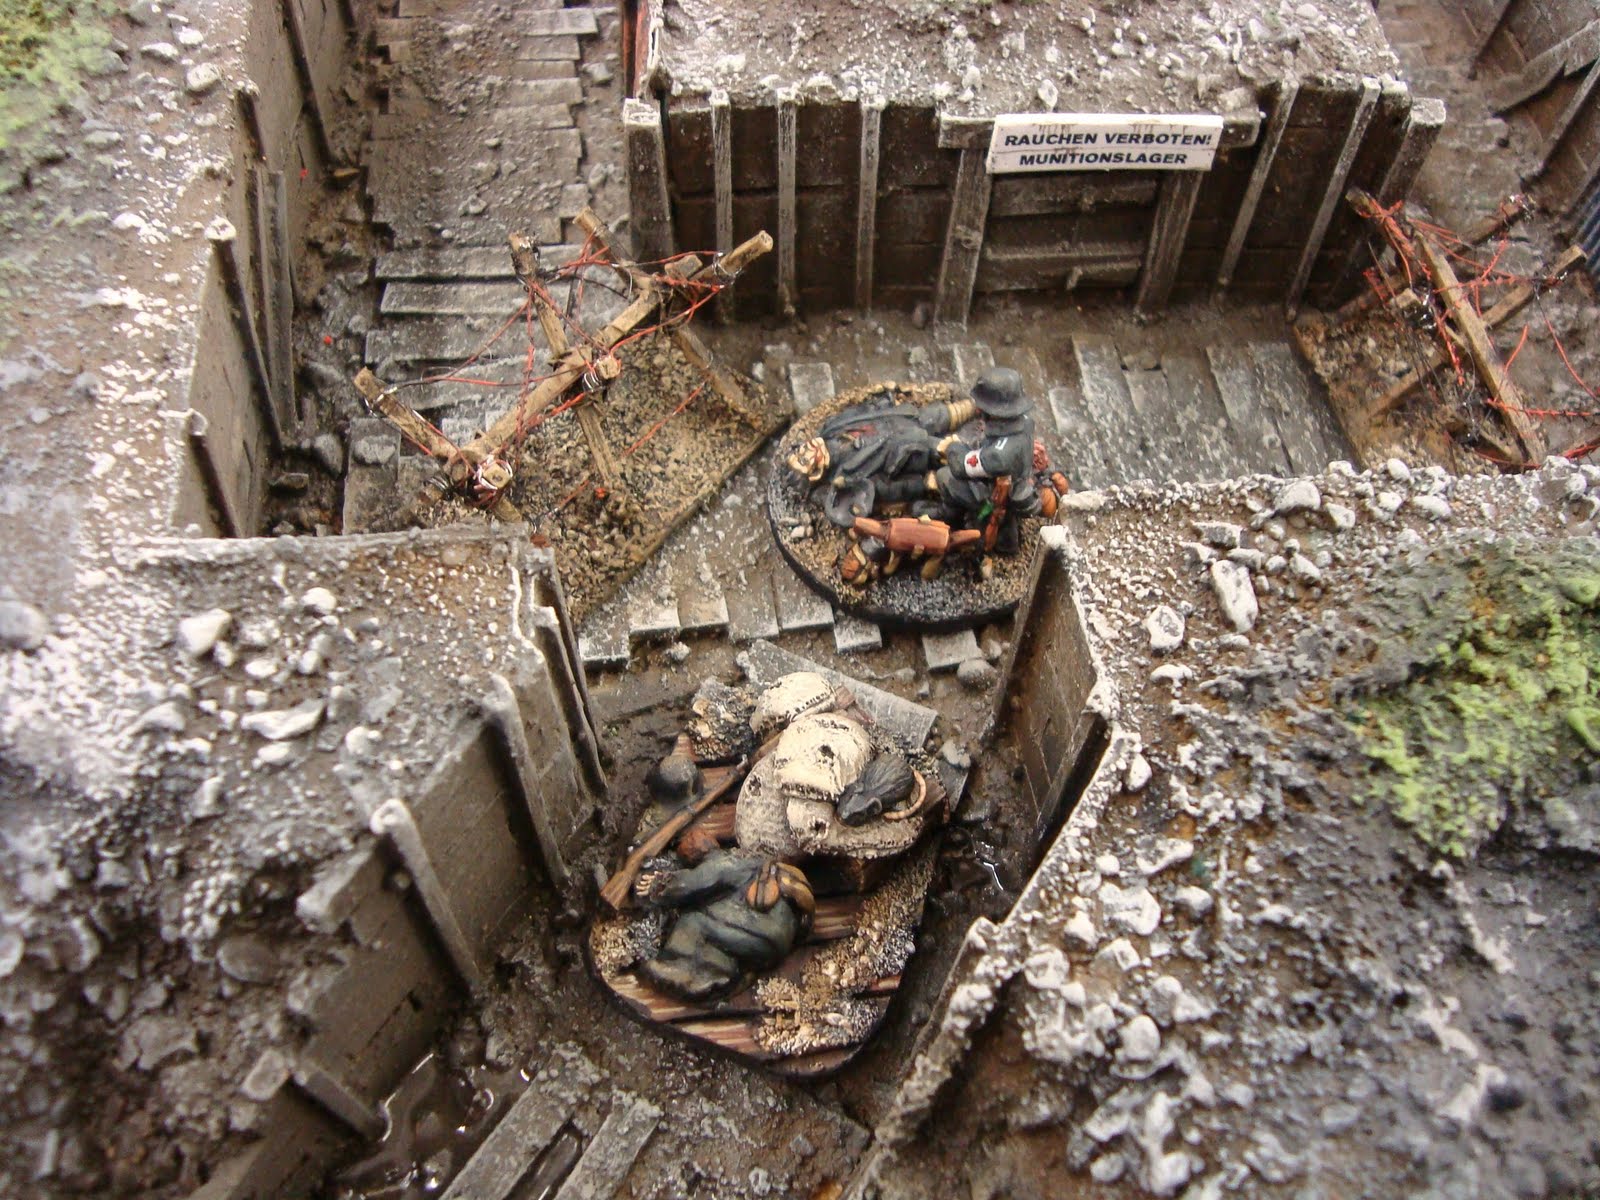
I finished painting the ruined version of das Rattenloch late last night.  It’s been a journey, I can tell you!  Ruined buildings always seem to take me far longer to finish than their intact equivalents, perhaps by an order of 50%.


I’ve detailed the full progress of the build in Richard Clarke’s and Nick Skinner’s “TooFatLardies Christmas Special 2012”, together with a set of thoughts and guidelines for building ruined terrain.  I thought it was only fair to post a couple of pictures here to see a small snippet of what you’d be getting before you rush out and purchase this fine publication.  Rich has told me that the “Special” should be available by next Monday (17th December) direct from the TooFatLardies site at the very reasonable price of £6.


I should add, dear readers, that I receive not a penny, euro cent or dime for my contribution to the Special.  That’s not a complaint!  But somehow I thought I’d mention it in case I was suspected at diverting people’s hard earned cash into my own pockets.  Perish the thought!!

For long time readers of this Blog, here’s a comparison shot, before the railway-artillery and after (so to speak), of the intact Rattenloch and the ruined version.


So, one project over and another about to begin.  I am talking, of course, about the exciting news that I’m taking part in the Analogue Hobbies 3rd Annual Painting Challenge.  This should be a great deal of fun, and already I feel a bit of a buzz about getting back to painting miniatures after a slightly frustrating autumn of real life work pressures and terrain building in the hobby. 


One of the suggestions this year is that the aspiring competitors paint their figures according to a “Personal Challenge Par”.  I’ve been thinking where my “Par” is likely to land, and which painting project theme I want to follow.   It’s a tricky decision.  I have a few projects on-going at present, but the  Analogue Hobbies 3rd Annual Painting Challenge seems a great opportunity to make a bold statement and try and paint through a whole new collection of figures.

With this in mind, and true to the fantastic spirit of the contest, I’m going to be focusing on ……  cue drum roll …….


 ……. painting up the force of French poilu from Verdun 1916 which I bought from Rob Broom at Scarab Miniatures back in (embarrassingly) December 2009.  These wonderful and characterful sculpts have languished in a cardboard since I bought them from Rob at the Gripping Beast Great war Games day in Evesham in December 2012.  And yes, it is about time I painted these figures and finally worked out how to paint Horizon Bleu!

The Analogue Hobbies 3rd Annual Painting Challenge starts at 12.01am on 20th December – so watch out for updates, folks, although you'll see any new painted miniatures on Curt's Analogue Hobbies blog first by a day or so.

And for those waiting for the Picts to appear – yes, OK, once I’ve done the les Poilu, the Picts are definitely next!

Sunday, 23 September 2012

Painting Great War German Infantry – Part 3


There’s not actually much painting in the third, and final, part of my series on painting Great War German Infantry.  As you’ll remember from last time, the Stellungsbattalionkämpfer figures were at least 95% finished at the middle of last week.
I did, however, get the chance to add a German command group, and finish some casualty figures which have been on the painting table for a while.
 

So, what changes did I actually make to the Stellungsbattalionkämpfer?

Tuesday, 26 June 2012

Das Rattenloch: Part 5 – Putty and Painting

A bit of a bumper update this one, to go through the last stages of building the late First World War German bunker, das Rattenloch, and its painting.  I don’t know how many of you have taken on board a project and felt it weighing like a small millstone around your neck until you finished it.  Well, that’s kind of how I felt in finishing this terrain board off!


Don’t get me wrong, I’ve really enjoyed the process of getting to where I have done.  However, what started out (rather over-optimistically) as a weekend project is still on-going three weeks later.  I’m not sure why it’s taken so long, although you’ll see that the “putty” stages with the bunker took a great deal longer than expected.  I’m sure there’s a quicker way of doing that part, and I’ve offered some suggestions of where I went wrong.

Wednesday, 20 June 2012

"Das Rattenloch" – Part 4: The Defenders of the Position


With sincere apologies in advance for yet more mangled German, this blog post introduced the occupants of das Rattenloch. What I wanted to try and do as part of the project was to integrate a small number of figures closely into the terrain. I would have one section to deploy intact into the bunker itself, and another couple of sections and support weapons which could be deployed into the position once the bunker was destroyed. The German defenders would be position defenders, or Stellungsbattalionkämpferer - far from the elite of the German army, but still more than capable of clinging on grimly in the face of repeated British attacks.


I was quite taken with the idea of trying to match the painting of the German defenders with the painting of the bunker (of which more in a future Blog post) and to try and match up the bases on the figures with the terrain in which the bunker is located. I thought this would probably be simple enough for the Stellungsbattalionkämpferer occupying the intact bunker position, but perhaps a little more challenging for the troops who would be occupying the destroyed version of the bunker which I’m currently building.

This might not make a huge amount of sense to you all right now, but please hang in there.  It should become clear eventually!

Wednesday, 15 December 2010

Trench Raids and “Winter Sports”

Over the past couple of weeks, I’ve been umpiring a couple of trench raiding games at the St Albans Wargames Club using the popular “Through the Mud and the Blood” rules from TooFatLardies. As readers of this blog will know, I’m a big fan of these rules which are written by a good friend of mine, Richard Clarke. We have been looking for a way to recreate some of the smaller raiding actions into a short game taking perhaps an hour or two, without loosing the sense of tension and violence which seems to typify the accounts of many trench raids.


What I’d like to offer on this Blog is a brief description of one of the books which I found to be really useful in preparing for the games, and then a brief after-action-report of the first two trench raids we have played through, spread over a couple of blog posts.

Almost every book on the trenches and warfare on the Western Front has a reference to trench raiding and patrolling. However, one book which I found to be really interesting in giving a view of the reasoning and policy behind raiding was “Trench Warfare: The Live and Let Live System” by Tony Ashworth. The sections about raiding are extremely well written and consider how (at least on the British side) raiding was assimilated in a general strategy of attrition and how raiding as an activity prevented or destroyed tacit truces between combatants along the frontline. I’d certainly recommend the book to people (second hand copies can be picked up very cheaply), and a lot of what follows are themes drawn or inspired by that book.


“a foul, mean, bloody, murderous orgy”

Trench raiding was brutal, violent, frequently horrific and fought on a particularly personal level in a war which was otherwise often typified by the role of artillery. The form of violence sometimes seems almost casual: “So I took off my tunic, slipped my old raincoat on over my leather waistcoat, dumped my tin hat on my head, and picked up my nail-studded knobkerrie.” (Siegfried Sassoon writing in “Memoirs of an Infantry Officer”, at page 19). Certainly, the tactics and weaponry could be quite different to those used on a large scale daylight attack. Sassoon again: “they were brandishing knobkerries, stuffing Mill's bombs into their pockets and hatchets into their belts...”.


The temptation to think of some of the early trench raids as a bit of a ‘punch-up’ comes through pretty strongly, an element of near near-cavalier terminology creeping into Field Marshal Haig’s description of raiding policy when he wrote that “At the present time I think our action should take the form of (1) Winter ‘sports’ or raids continued into the Spring; (2) Wearing out fight similar to 1 but on a larger scale at many points along the whole front” (Douglas Haig’s Diary 14 January, 1916).


But whether we read about soldiers preparing sometimes near medieval weapons, or treating the raids as almost a “sport”, for most of not all this was a deadly serious business. “I do not know what opinion prevailed among other battalions but I can say that our greatest distress at this period was due to that short and dry word “raid”. Adducing one reason or another, the lowering of the enemy’s spirits, the raising of our own, the identification of some supposedly new troops opposite, the damaging of the German trenches, the Great Unknown behind us were growing infatuated with this word”(Edmund Blunden, "Undertones of War", p177)

The First Raid

To try and recreate the raiding actions on the Western Front, Richard Clarke has put together a short article “Winter Sports”, which is included in the TooFatLardies Christmas Special out this week, for use with the “Through the Mud and the Blood” rules. In the game, the raiders are given a mission (here to rescue Captain Carter, captured by the Germans earlier in the day), select a raiding team, and attempt to cross no-man’s land undetected in order to attack the enemy trenches and “Get Carter”. The defenders have initially limited troops and resources, but when (or if) the raiders are spotted additional troops and weapons will become activated.

The battlefield was a small trench table, using the terrain boards I built last year. The whole are was 4 foot square, with a front line trench, several dugouts and bunkers and a couple of communication trenches leading to the rear.


So, to the game.... The British raiders were lead by Lieutenant Reggie Carshalton, supported by Sergeant Alf Mitcham and Corporal Bill Banstead (all fictional names, with each leader, or Big Man, representing the three British players). Conscious of their mission, all three British players resolved, with determination to, “Get Carter”! Each leader was commanding a section of 8 soldiers, armed variously with bombs (hand grenades), rifles and other “trench cleaning” weapons.


Against them, the deceptively peaceful German lines were garrisoned with three sentry posts, two groups of Stellungbattalionkämpfer (basically line troops with rifles but few hand grenades) and four leaders (one officer and three NCOs). The figures were Great War Miniatures and Renegade Miniatures, with a couple of Old Glory sentries added in for fun. Here are two of the sentry positions I used...


...and here’s a group of German officers appearing, briefly, from their command dugout to scent the night air, enjoy a cigar and watch the SOS rockets further down the line.....


The German defenders also had the chance to activate a heavy machine gun as the raid progressed, and of calling on two groups of Eingreiftruppen (tougher and better armed German troops from the support trenches).

The game was ready, taking place in the dead of night on a cold winter’s night in Northern France, early 1917. The British raiders chose not to concentrate their forces, stealing quietly through the shell craters of no-man’s land and cutting gaps in the German wire.


In a couple of places, carefully laid tripwires and an assortment of old tin cans hanging on the wire gave a tinkling sound, alerting the German sentries to the fact that something was happening out beyond the front line trench.


It was a tense journey for the raiders, crossing the battlefield and the remains of so many fallen comrades and enemies...


At last the first raider section, led by Sergeant Mitcham, jumped down into the German trench...


....and were quickly in action against a group of German defenders lead by red-eyed but still alert Gefreiter Artur Spengler. From sleep to fighting for his life in less than 10 seconds...


A general alarm was sounded, and the cold night sky was quickly criss-crossed with dozens of Very flares and SOS rockets, bringing other German Stellungbattalionkämpfer quickly to the action, many heading in the direction of Lieutenant Carshalton’s section, the young officer still negotiating his descent into the German trenches.


The German HMG, a Maxim MG08 in a heavily reinforced shell crater, was also made ready to repel the attackers...


Other German reinforcements continued to arrive, including the first of the Eingreiftruppen, better equipped with stick grenades.


A brief, vicious series of close assaults followed in which the Sergeant Mitcham’s raiders were forced out of the front line trench and Lieutenant Carshalton’s troops were pushed back by the arriving reinforcements. After taking heavy casualties, the raiders decided that discretion was the better part of valor and swiftly left the trench, leaving casualties behind no both sides. The British players did not succeed in their mission to “Get Carter” and secure the recue of the brave Captain, at least not this time.


A tough, violent fight, very much along the lines of “a foul, mean, bloody, murderous orgy” rather than “winter sports”, but with the honours firmly left with the German players. Next blog, I hope to show you the second raid, which we played last night, which featured a “peaceful penetration” by an Australian trench raiding team. Hope you can join me for that!
Tuesday, 20 April 2010

Planning a Fortified Village

Welcome back! And for those visiting for the first time....what kept you?

One of the terrain items I was looking forward to adding to the Trench Terrain boards we built for the Salute 2009 game was a small village, placed close to the front line. The more I had read about The Great War, the more I was intrigued by how the different combatants on the Western Front, and the particularly German armies, sited their defensive strongpoints on villages, hamlets and wooded areas, and interwove these strongpoints with trench lines. I found some fine descriptions of these arrangements in Jack Sheldon’s books “The German Army on the Somme” and “The Germans at Beaumont Hamel” and also in Terry Norman’s excellent “The Hell They Called High Wood”.

As I read thorough the description of the German defences at locations such as Beaumont Hamel I was interested in the way that the cellars of the village houses had been tunnelled through to interlink with the German front line trenches. This made the villages formidable defensive points, capable of holding up attacks for a considerable time. And so an idea was forming to construct a shell damaged village which could be used as major strongpoint in a trench line game.

Following the shows at Salute in March 2009 and Partizan in May 2009, Richard Clarke, Nick Skinner, Mick Tucker and I had also planned to visit the Crisis show in Antwerp in November 2009. The plan was to build a couple of new Trench Boards on which the “village” could be located. I planned to do this during the summer months in which nothing much else would be happening, with plenty of time to spare before the Crisis show. What would be simpler?

Ah, if only I was clairvoyant....

I found images of shell damaged villages from the Western Front depressingly easy to locate on the internet. Some, like the image of Zonnebeke below, simply showed piles of shell shattered bricks and wood. While it would have been accurate to model a completely destroyed village, we still wanted to make sure the game would be attractive to the visitor to the Crisis show. We wanted to catch the eye, and we felt that piles of splintered wood and broken brick walls barely an inch high, while dramatic, wasn’t the “look” we were aiming for in the Crisis game.


You might remember when we built the trench boards we were trying to re-create the type of new, relatively undamaged fortifications from the Siegfried Stellung in 1917 or 1918. It didn’t seem unreasonable to consider that the various lines comprising the Siegfried Stellung could have incorporated a fortified village of the type we wanted to build – damaged, but not yet destroyed.

I then located images from Langemarck and Zonnebeke and some of the other villages around the Ypres salient taken in 1915 and 1916, both on the net and in Peter Barton’s magnificent book on the panoramas of Passchendaele. These photographs showed the villages after some fighting but before the complete obliteration of these communities later in the War. The images (some of which are added below) conveyed the type of damage which we were trying to achieve in our modelling. There was also the added attraction of very loosely trying to copy Flemish buildings, being mindful of the Crisis 2009 show being set in the beautiful city of Antwerp.


After deciding on the “look” of the village, I wanted to try and think of a way in which the buildings could be fully integrated into the Trench Boards. I was very happy to place the buildings directly on the Trench Boards when needed, but wanted to try something a little different for a show like Crisis. I wanted to use the depth of each of the board, basically being 40mm of so of Styrofoam, in the same way as we had used it to cut out the trenches.

The idea came to me, oddly enough, when reading through a copy of the “Town Cryer”, a great supplement which Games Workshop used to publish for their Mordheim game. This contained rules for tunnel fighting. I started browsing Mordheim sites on the web and found the Gidian-Gelände website featuring a stunning table built for Mordheim, complete with tunnels, cellars and sewers. Here’s the site – I thoroughly recommend a visit:

http://gidian-gelaende.de/Material_HP/Wolfgang/WIPmortheim/album/index.html

The Mordheim terrain Gidian had built was more elaborate than we needed, but we picked up some great ideas on how to build cellar and link these together (or not) and how to create access from the buildings to the cellars. So, here’s another of my terrain building maxims: “Never be too inventive to forget to learn from the Greats”. So, for the record Gidian.....thanks for the inspiration!

Anyway, in the next few Blogs I’d like to describe how we went about building the village, and how we ended up with our final design. But to let you know there’s an end in sight, here’s some images from the final Trench Boards, featuring the village of Vlissinghe ....


....all quiet before the storm....


.....defended by German stosstruppen.....


......some of which have decided to take refuge in the crypt of the small Flemish Church of Sint-Griete.

Monday, 29 March 2010

Painting the Town Green and Super-Detailing

The final stages in building Trench Terrain are perhaps the most fun of all. Before you paint the terrain, it looks like, well, lumps of card and dyed green towelling stuck to blue Styrofoam. There's nothing much to catch the eye.

It’s time to bring the terrain to life. There are loads of terrain painting guides on the internet and in the Games Workshop terrain books I posted on before. As I mentioned in an earlier Blog, painting terrain needs a different gear to painting miniatures. Think Macro, not micro.

We’re talking here about matt emulsion paint and home decorating brushes instead of Vallejo paints and size 00s. For wargamers used to being bent over at a painting table trying to pick out details of uniforms, it’s actually a really pleasant change. What I also found really useful was the help of friends from the TwoFatLardies wargaming group, simply just coming over and having a beer with a paintbrush in hand.


Painting terrain is a bigger job than painting miniatures, but in my view it should always be approached as a really fun, relaxing, “pressure off” part of the hobby.
The base coat of paint should help blend everything in, but it’s when you start to dry brush the terrain, and the trenches in particular, that everything really starts to come alive. Our base coats were a fairly dull green straight out of the matt emulsion tin for the grass, a dark brown for the shell-craters and dark grey for the soil and rock thrown up around the shell craters. I kept the interior of the trenches a dull brown, and then highlighted with a dusty ochre colour.

I felt after trying a few colour schemes for the trenches that it didn’t really matter if it wasn’t colourful. My reasoning went as follows. Firstly, your carefully painted miniatures will be in the trenches and you don’t want anything to gaudy or bright in the trenches to detract from them when people are watching or playing the game. Secondly, the main thing to remember about painting the trenches is to dry-brush and bring out with texture of the mud and the wood planking – and you don’t need fancy or gaudy colours for this. Remember to also try some dark rust/ brown paint washes for the rust on the corrugated iron.

The towelling should be dyed green already, and the PVA/ Interior Filler mix will have seeped into the towelling giving a rock hard base. This is a great, sturdy gaming base. But being a bit paranoid about how the terrain would fare in a year of heavy use and touring round different shows, I wanted to make the terrain as durable as possible. I therefore mixed some neat PVA with a base dark green paint to cover the towelling. I’m not sure this is essential, but it makes the towelling incredibly rigid and durable. Basically, once it’s glued down and covered with PVA/ paint wash, the towelling is going nowhere for a decade at least! Dry-brushing with neat green and ochre shades looks good, especially when finished off with some poppy scatter.

The following action from one of the pre-Salute 2009 games should give an idea of the final colours we used. First, an overhead view of the trenches with the German defenders under pressure from "C" battalion of the Royal Tank Corps....


....and then a close-up view of the trenches, with the German eingriffkampferen streaming forward to stem the Royal Surreys' attack...


Super-detailing, or “Can you see my signal rockets?”

What we did after finishing the basic trenches was take a break and play a few games. We got the feel of trench wargaming and started to think about whether we wanted any extra boards or whether we wanted to make any new large scale terrain items. While we were deliberating, I started adding some super-detail to your trench system...all the little items which makes the terrain come alive.

My maxim here was "catch the eye, but not too much". Personally, I think this is one of the nicest parts of finishing a project – coming back after a month or so and making just a small detail to enhance the overall shape and appearance of the terrain. But I didn't want to overwhelm the overall look of the Trench Boards with too much going on. I had in my own mind some large additional centrepiece terrain items (which I will be posting on later this Spring in part 2 and part 3 of this Blog), so anything going into the trenches as additional small terrain items needed to be eye-catching, but not over-powering. They needed to be something which people would like to see when they caught sight of it, but not something which unbalances the overall effect in the game. Super-detailing is quite a personal choice, and that was mine.

So, here, in that vein, are some SOS signal rockets made from scraps of balsa wood and some barbecue skewers just by the entrance to a Stellungsbattalion bunker. You can also see a pile of boxes and a large rat from Pardulon Miniatures (www.pardulon-models.com) watching the action.


Some other things I've made since have been various boxes of stores, a pile of hand-grenades at the ready and a couple of casualty figures to specifically fit within the front trench line. Here's one I called "Communications Down"...


And here's a selection of other German Stellungbatallionkampfer casualties to lie in the front line trench or the space between the front line and the support line trenches....


Well, that's the end of Part 1 of the Blog. Trench terrain is not anymore complicated or expensive than normal wargames terrain. Basically, at least in my book, it can be as “cheap as chips” (I’m from Yorkshire, after all), but it does take a while, simply because of the scale. However, if you have the space to try it, friends to help you out and an adventurous approach, I'd venture to say that absolutely anyone reading this Blog can make something just as good as what we produced. As I mentioned in the last post, the next few blogs will focus on constructing a ruined village on the Western Front.

Hope you can join me for that.

The Flexible Art of Slotting and Dropping

First, an apology for all who have been waiting patiently for the next instalment in this Blog. Please rest assured that I had not forgotten to update the Blog, but work got in the way of doing this (depressing, isn’t it, how that happens so often). Anyway, I am back and hope to finish stage 1 of the Blog a little later today (covering the Salute Boards). Stage 2 (the boards from Crisis 2009) and Stage 3 (new terrain boards) will follow in April 2010 and later in the Spring, respectively.

And a huge thank you to everyone who has become a “follower” of the Blog and who has left comments on the wargaming sites on the internet. It really is great to hear from people about their experiences of terrain building, particularly regarding terrain from the Great War. Anyway, on with the Blog....

I mentioned at the start of the Blog that we wanted to create the maximum flexibility in our terrain design. Sometimes this won’t always be possible. There might be that scenario which calls for a bunker to be deposited in that odd location on the board, or that shell-shattered wood in just the oddest of positions. But there may be other times that you just know that you want to build in a bunker or a gun position somewhere on the board, but you simply don’t want it there all the time.

Now don’t get me wrong. Of course you can just drop bunkers or strongpoints on the boards anywhere. I’m definitely not the sort of person who would ever think badly of anyone who did that. Quite the contrary, I do it all the time myself. But for the Great War Trench Terrain, I wanted to try and integrate these terrain items into the boards, making them a real feature of the terrain and something which looked as realistic as possible. My reasoning was that since I was trying to create the trenches dug into the terrain, i thought it would be consistent to try and do the same with the other terrain features.

I tried to go about doing this in two ways....

First, for the smaller bunkers which were a feature of the German Stellung in the Late War period, I created an area which could serve as an MG pit. Perhaps this was an old crater in the line which has been reinforced, or perhaps this was a deliberately reinforced area from which a machine gun firing on a fixed line could be situated. I made the proportions of the pit fairly square so I could also slot a small bunker on top of the pit. I also used the Styrofoam cut away from the main board as a base for the small bunker. This enabled me to make sure that the Bunker could be effectively “slotted” in place and would not move during the game.

Here’s a few photos of the pit being created, with some 28mm figures added for scale. I’ve tried to show how the Styrofoam cut away forms the base of the bunker to be placed on top of the pit.


Here’s another shot of the bunker in action, painted and finished with some camo netting and flock and positioned on top of the MG pit. The battle scene is from Crisis 2009. Hopefully you can get an idea of how the bunker can in some games be used to reinforce a flank (here of a village), or a trench support line. Or, if you prefer, the bunker can be removed and the defenders left with a weaker position.


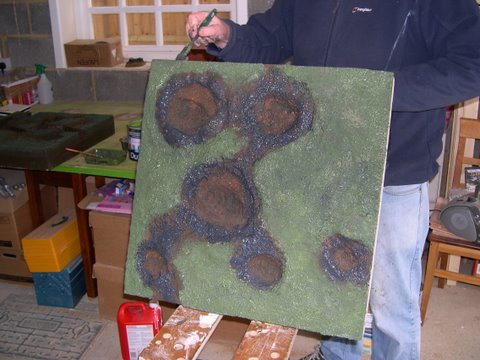
Second, I tried to use the same general principle for creating “segments” to drop into the game boards. This takes a bit more work but in my view is really worth it and adds tremendously to the flexibility of the boards. On the first rank of "No-Man's Land" Trench Boards, I created whole sections which are cut out from the Styrofoam and can be dropped in place. So, when the board is used as no-man’s-land, the dropped segment is a reinforced crater for the attacker’s jump off point. However, when the board is reversed it can be sued as as a rear rank board behind the support trench, with the shell crater segment removed and a segment dropped in place representing a field gun position, a bunker, a casualty clearing station or an anti-aircraft MG mounting.

Here's a picture of the shell crater on one of the rear boards being made.


Next, a close-up of the finished shell crater segement in position "slotted" into the Terrain Board. The rubble in the crater was built up using builder's sand (a coarse, rough sand with numerous small pebbles, and fine talus. The "wood planking" is thick-ish cardboard, and the "corrugated iron" is actually corrugated cardboard. I wanted to try and create a different effect for the trenches leading into the shell craters, suggesting that they'd been hastily sapped forward by engineers...


And then a picture of the Royal Surreys preparing to leave that shell crater during one of the practice games before the Salute 2009 show.


And here's another shot, this time of all the Trench Boards we made for Salute 2009. You can see the three crater segments in each of the Trench Boards nearest the camera - each crater in the segment is surrounded by sandbags and improvised revetting using wooden boards and corrugated iron brought forward in the saps by the field engineers. You can also see how we used these boards as "jump off" saps for the attacker, with some sections with rifle grenades and some command elements being left in the saps as the lead sections close into an assault.


Designing each segment to drop in is good fun, and adds a lot of variety while still being integrated into the terrain. By designing and building different segements you get the maximum use out of the terrain, enhancing flexibility and preserving the effect of features being built into the terrain and not just placed on top of it.

Sometimes the segment can be a mini- terrain feature in this own right, such as this destroyed German MG position I made for our wooded “Copse 125” Terrain Boards.


Related Posts Plugin for WordPress, Blogger...