Monday, 18 October 2010

SELWG 2010: A Grand Day Out

Together with other members of the TooFatLardies roadshow, I headed down to the South East London Wargames Group’s SELWG 2010 show yesterday with our American Civil War participation game of “Terrible Sharp Sword”. This is the expansion for the ACW to Richard Clarke’s “Sharp Practice”, his really successful Napoleonic skirmish rules. We’d planned to “demo” a couple of participation games at SEWLG on the boards Richard had originally made about three years ago when “Sharp Practice” was first published and demo-ed at the International Napoleonic Fair in Essex.


When the terrain boards were first made, Richard had set them as a beach line with a couple of small hills with a Martello Tower on the dunes. During the last couple of weeks, he’d turned these into a muddy part of the Mississippi delta, with a Southern mansion, moonshine tavern and a fishing shack. Although one of the players mentioned it looked quite a bit like Essex…..”Canvey Island mudflats is it?”.....I thought the effect was great and even better than the old beach terrain we’d started with.


Our participation game was pretty busy throughout the day. We met some great people. There’s little in the hobby which is better than meeting new folk and chatting through with them what they’re working on, what it is which is interesting them right now, and finding out how their clubs are doing. The games seemed to down pretty well with the playing public, and we had full teams for the Unions and Rebs both days, which is always a relief so that my very dubious tactical skills are not called into use. Here’s some snaps of the game being played.


It was also a good time to meet up with some old friends, although sometimes all too briefly as I saw them disappearing off to their cars with mountains of terrain, games and figures throughout the day.

The SELWG show seemed busy in the morning, a little less in the afternoon. I guess that’s the usual way, and it seems to happen at most shows. I can only think that the exception I’ve been to was Vapnartak in York in its old venue of the Merchant Adventurer’s Hall, but that might be because people could not actually get into the tiny venue in the morning and had to wait until after lunch to get a look round!

I thought that the venue, the National Athletics Arena at Crystal Palace, was pretty good. It’s a bit strange sharing a wargames show in the same building as a swimming pool, but that mix didn’t seem to cause anyone a problem once you got used to looking at metal figures in sight of someone doing the backstroke. The games were concentrated in the main Basketball Hall with the traders around the edge of the hall, and that arrangement seemed to keep everyone pretty happy.


As for games, I spotted some really inspiring ones. Pride of place for terrain went to Shepway Wargames Club with their “Hochwald Gap” game from 1945. This was a staggering piece of work, with a fantastic evocation of a cold scene from January 1945. Every element of the terrain and figures shouted "winter", from the barren hedgerows, the frozen grass, the muddy roads and tracks, the winter-whitewashed tanks or the dead leaves around the blackened trees.


The display had some really great touches in the modelling of the vehicles and figures including muddy wheels and scratched paint work. A couple of RAF Bostons completed the look.


All of which took a huge investment of time and enormous effort by the Shepway guys. The guy I spoke to ruefully mentioned he was looking forward to not looking at another 20mm wargame figure for a month of so. I think we’ve all been there at some point, although the game he’d created was a real stonker.

Another cracking game was Southend Wargames Club’s Great War battle with French and Sikhs attacking a German trench line. I thought this was a game with a little of everything…… well thought out terrain, an interesting scenario, some fantastic conversions of Great War Miniatures figures into Imperial Sikhs and an attractively modelled town.


Like the Shepway bunch, the Southenders were very friendly and I came away with a load of ideas about building an MDF pillbox, some artillery dugouts and a ruined car or two. I doubt my photos really do it justice, but it was a great game and being played in a terrific spirit whenever I wandered across to take a look. Expect to see their great ideas respectfully emulated (a.k.a. respectfully ripped off) in some of my own terrain extras over the course of the winter!


Also really well done was the fact that the Southend chaps had converted part of the wargames table as a small library of Great War books and troop deployment area. This was a nice touch. I’ve seen it done before in a couple of games, but this was right at the top of the gaming area, giving the punter a chance to look at the models, gave a read of the game scenario and take a browse through some books on the War before they looked over the game. A great touch, I thought.

There were lots of other fine games going on, but the last one which caught my eye was the Loughton Strike Force’s recreation of Davout’s attack at Wagram from 1809. I’m far from an expert on the Napoleonic Wars, but what I saw looked like a near perfect game of Napoleonics…..smart terrain, a table nicely full (but not over-burdened with units), clear unit indicators and casualty markers and again some really welcoming guys playing and explaining. I’ve seen the Loughton games before at Salute and the International Napoleonic Fair and I’ve been very impressed. Wagram 1809 was no exception.


The journey back wasn’t too bad. I was still feeling fairly chilled by the end of the day. I realised yesterday that meeting and greeting punters and other wargamers is far less knackering than running a participation game and explaining how the rules work, making sure the players are having a great time and the thousand-and-one-things you have to do with a participation game.
Oh…did I buy much, I hear you ask. Well, it was a wargames show and I like to help the traders as best I can! I picked another Kaiser Rushforth case for when I’ve finished the Great War French, and three books. I’ve wanted to read “Come On Highlanders” for a while, and the “Passchendaele: The Hollow Victory” looked interesting. I picked them up for £8 each.

Seeing “Sturmtruppen” book was a genuine surprise, as I’d not seen it advertised. I have the Tankograd book on the A7V, which is fantastic. I felt I’d get the same original insight and photos from the “Strumtruppen” book, and a quick look last night confirmed that it’s packed with new photos and seems to have new analysis of the stormtroops’ tactics. So, all in all, a grand day out!

Tuesday, 28 September 2010

The Devil’s Chariots

There’s nothing like seeing the real thing when you’re trying to build a model armoured fighting vehicle. No amount of looking through old photographs, or browsing through a book can quite replace the excitement of seeing for yourself the scale, the size, the toughness of a battle tank, whatever the period.

Living just outside London, I’m rather spoilt for museums of all kinds. It’s been about a decade since I had last visited the Imperial War Museum in Kensington, South London, but I took my daughter a couple of weeks ago. Ostensibly, we were taking a trip to see the “Horrible Histories” exhibition of “The Terrible Trenches” (which was really great for kids of all ages), but I also wanted to get a good look at the Mark V tank, “Devil”, and a few other Great War items.


As you might remember from previous Blog posts, I’m building a representative section of “B” Battalion of the Tank Corps from 1917 for use in our games of “Through the Mud and the Blood”, including four Mark IV tanks. As any “tankies” out there will know, the mark IV tank was being used by the Tank Corps in 1917, with the Mark V tank only becoming available for battlefield service the following year. Indeed, the Mark V was a considerable improvement on the mark IV tank, featuring hand-braked epicyclic gears on each end of the cross shaft which revolutionised driving and enabled one man to control the tank alone (the Mark IV required four men to drive it). While the earlier Mark IV tank produced by Great War Miniatures is the model we have been using in our games, in creating a feel for the scale and size of the tank, and getting that all important inspiration, the Imperial War Museum’s Mark V “Devil” was perfect.


One of the first things which struck me when I got close was the sheer size and impression of power of the tank. Of course there have been far bigger tanks built since, but in the Great War, with other comparable vehicles only being the size of armoured cars, the sight of a tank approaching a trench must have been terrifying.


When I started to look at the details, I was struck by single 6pdr 6cwt QF gun in the left sponson of the tank (the right sponson being removed to give a view into the tank’s interior). For some reason, the bore of the gun just seemed narrower than I had imagined when reading about the accounts of 6pdr case-shot being pumped out onto enemy strongpoints and machine gun bunkers.


The interior view of the tank was very interesting. With the right sponson of the tank being removed and replaced with glass, you can clearly see the cramped interior in which the crew of eight men would have fought. It’s not difficult to imagine the stench of cordite, smoke and petrol fumes during the heat of a battle within the (notoriously badly ventilated) interior.


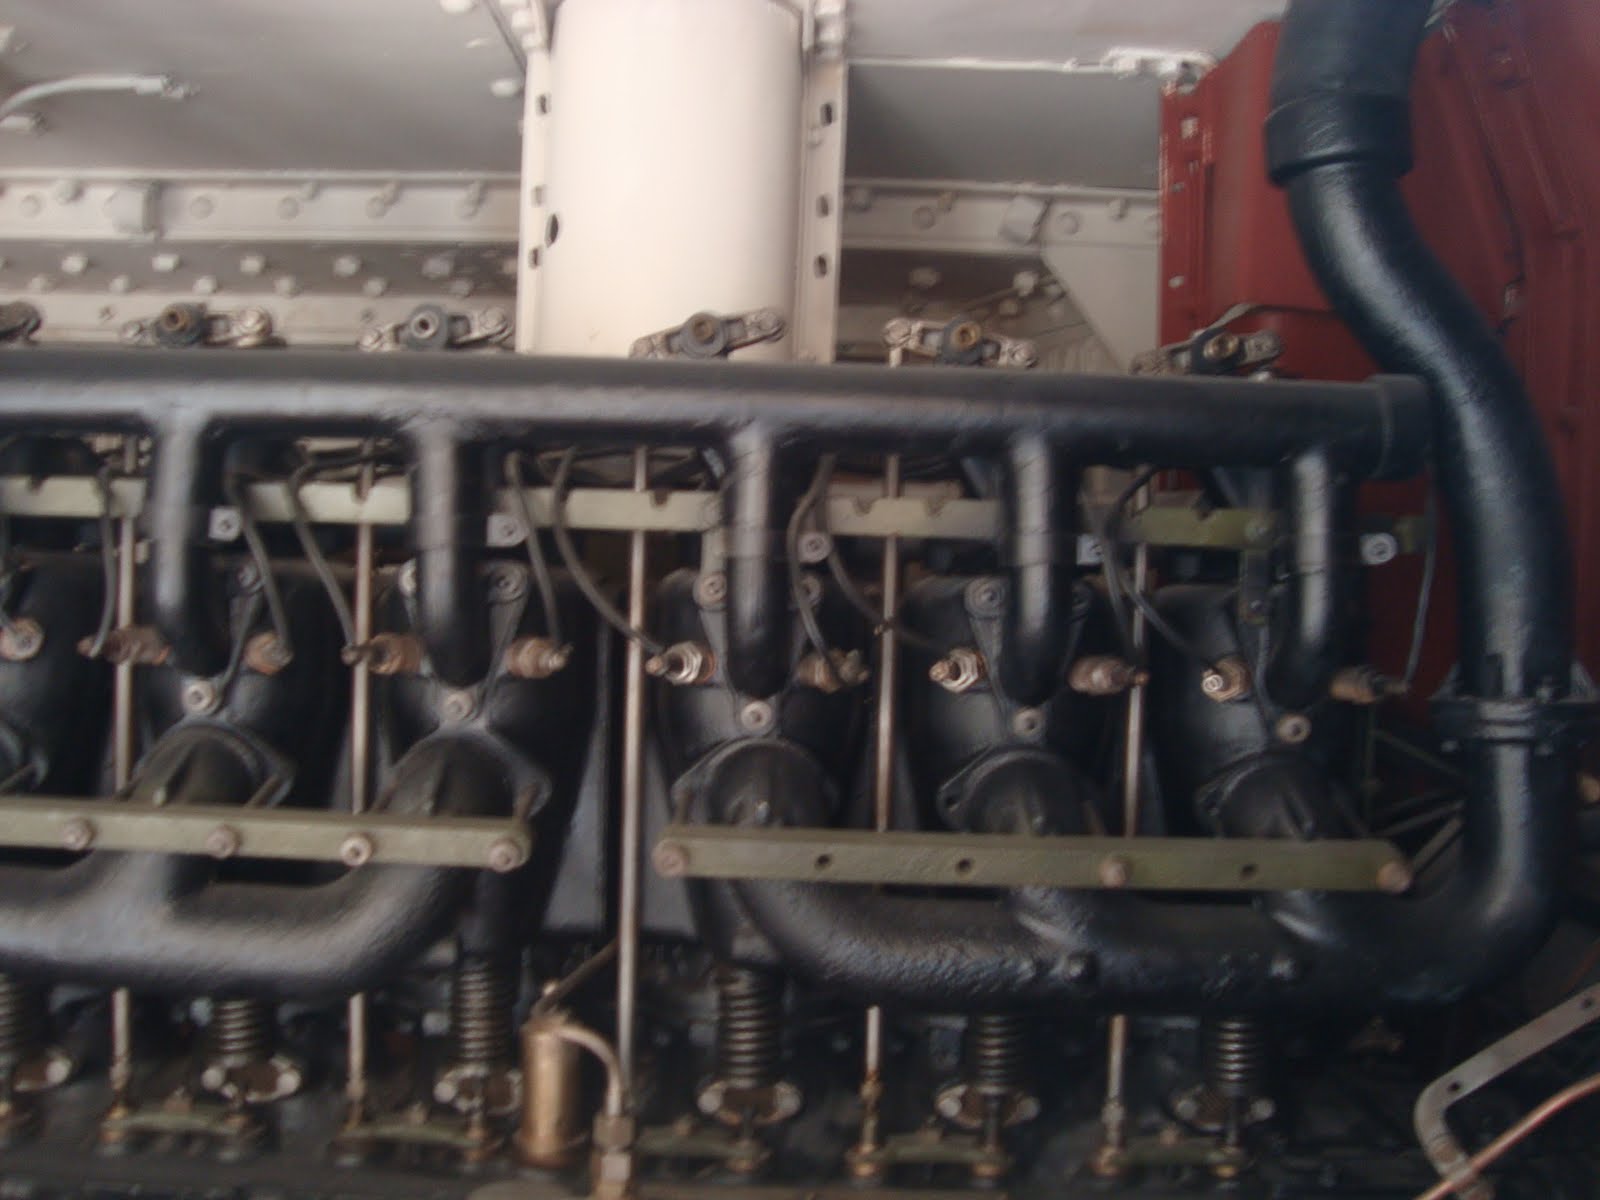
The purpose built 19 litre six cylinder in-line Ricardo petrol engine giving 150 HP utterly dominates the interior. Ninety-seven years on, from my home in a leafy suburb of London, it’s very hard to understand what soldiers must have gone through after being closed up for 8 or 9 hours in a tank, sometimes having to “mask up” against poison gas. Looking through the glass into the interior of “Devil” gives just a small clue what it might have been like.


Quite understandably it is not possible to enter into the tank, but even looking at the door hatch on the rear of the sponson made me wonder how on earth anyone could exit quickly from a tank on fire. Just when this came into my mind, I then remembered that the male tanks were the easier ones to exit in an emergency, with the a female tank’s entry and exit routes being far more inaccessible under the machine gun sponsons.


In all, while not contributing to the actual ability to produce a model, I really felt that seeing the Mark V close up made my Tank Corps modelling project seem closer, more immediate. At the very least it was inspiring, but more importantly I felt it gave me a more a human context to the project.

Monday, 27 September 2010

"B" Battalion command group and supporting Austin armoured cars

With apologies for not driving my Tank Corps project on with as much force as I’d like owing to work and family life, here’s the next few parts of “B” Battalion from 1917 completed.

First, there’s the command group consisting of the Prince Henry Vauxhall car, the Battalion Commander and a despatch rider. I was fairly pleased with the way that the Prince Henry Vauxhall, a Matchbox Models of Yesteryear purchase for a couple of quid on EBay, painted up. It really was a joy to dry brush and weather. It’s perhaps slightly out of scale and a little on the large side, although the Sloppy Jalopy chauffeur looks the part. The motorcycle despatch rider from Great War Miniatures was a real joy to paint.


I managed to finish the Austin armoured cars this weekend, working either side of my daughter’s birthday party. I was pretty pleased by how both cars came out in the end. I used the same painting and weathering techniques as I used on the Prince Henry Vauxhall to try and keep the project fairly consistent in its appearance. Just as a reminder of how I started, after thoroughly washing the cars in soapy water I primed and undercoated the cars in Humbrol matt black enamel.


I then added a heavy wet-brush of a Vallejo Russian Green mixed with Vallejo Black, followed by a wet-brush of just the Vallejo Russian Green.


I dry-brushed the cars next with a mix of Vallejo Russian Green and Vallejo German Camo Ochre. I did about four of five dry-brushes, adding progressively more of the ochre each time, trying to get a scrubby, weathered appearance on the exposed parts.


I then tried a weathering technique from the Forgeworld “Imperial Armour Modelling Masterclass, Volume 1”. I loaded up an old brush with a very heavily diluted wash of white spirit/ turpentine thinners with burnt umber oil colour and dark rust weathering powders. I then gently flicked the paint onto the model, trying to focus on areas where rusting would naturally take place. I tried the technique on a spare piece of paper first to make sure the brush wasn’t overloaded. I thought this was a very simple technique, but it did look (at least to my eye) good on the cars. I varied the colour a little by adding progressively less, then more of the weathering pigment in the thinned mix.


Then, before the paint was fully dry I washed clean thinners over the flicked on paint. Some of the flicked on paint simply disappears, other spots start to seep naturally over the dry-brushed paint work, and the larger spots of the rus/brown umber mix blur on the sides of the car. When you’ve worked about 15 minutes on this process, the result looks a little like this.


Then I heavily diluted some black oil paint with thinners and washed the mix around all the nooks, crannies, hatches, rivets, engine filters and engineering pits on the cars, watching the mixture slowly pool into the darker areas. Using a fine brush this took about 5-10 minutes per car, although I repeated the process a couple of times to make sure that some of the areas between the armoured turrets were a little darker.


After the thinned black oil paint had dried, I dry-brushed a mixture of Plaka Gelb-braun paint mixed with some weathering pigment from MIG onto the model to simulate mud and dirt accumulated on the steps of the car, and the lower running gear. I love the Plaka range of water based acrylics for this sort of weathering as they are slightly “grainy” in texture and mix beautifully with the weathering powder.

Finally, I painted the tow chains I’d glued on the front of one of the Austins and added the unit identifications on the front engine plate.


I really enjoyed the painting and weathering of the vehicles, not least because the weathering helped to mask a couple of slight imperfections in the resin cast of the cars. Next up, I need to varnish what I've finished so far, finish off the bases of the vehicles and tank crewmen, paint the remaining converted 6 tank crewmen and then finally paint the four mark IV tanks from the Battalion. I'm hoping to blog a little later this week on how I'm getting on.

Finally, I've arranged last week for the trench terrain to be making a trip to Burton-Upon-Trent in November for a TooFatLardies games day with some friends in the Midlands and North of England. I'll taking up the "Copse 125" terrain boards which shoudl allow for a decent sized (and hopefulyl fairly dramatic) game, so watch out for those in future blogs in October together with some shots of the game being tested.

Tuesday, 14 September 2010

Tank Corps Crewmen - Work in Progress

After this weekend and last night, the Tank Corps crewmen are about 90% of the way there. The photographs didn't really come out as well as I would have liked, but I have posted them in the interests of giving a quick “work in progress” set of pictures. I promise I shall take a proper, “in theme” set of photographs when the Tank Corps project is finished. Anyway, here's 12 Tank Corps crewmen (with another 6 awaiting completion), all from Great War Miniatures. Only one has been slightly converted in the group below (the officer with the tan overalls, of which more below).


You’ll see that I painted one of the officers in a darker coloured set of overalls, trying to replicate a well known photograph of Second-Lieutenant Reginald Lyles, MC at the Tank Museum at Bovington wearing what appears to be a pair of leather overalls.


I’m guessing that officers with a bit of cash to spare might well have supplemented their standard uniform with such items when on leave. Certainly there are many adverts in Peter Doyles’ splendid (and reasonably priced) book “Tommy's War: British Military Memorabilia, 1914-1918” for items such as trench periscopes, raincoats and revolvers. It seems fairly reasonably that an officer recently transferred to the Tank Corps might have wanted to personalise his kit with the addition of privately purchased overalls. I’m hoping to get a “leathery” look for the officer’s overalls with the help of some satin varnish.

I also finished up the casualty bases. I’ve no idea if the wiring used in the Mark IV tanks was coloured. I’m guessing probably not, but I felt it made a nice touch to try and colour the wiring (green and red stripes) which is scattered on the ground from a destroyed or badly damaged tank, even if just to distinguish the wiring (made from picture hanging wire) from grass scatter on other bases!


Monday, 13 September 2010

"B" Battalion of the Tank Corps, 1917

I’ve spent a fair part of this year finishing my British and German infantry forces for “Through the Mud and the Blood” and finishing bits and pieces of terrain for my Great War gaming table. Until about a fortnight ago, however, I had done nothing regarding building up a force from the British Tank Corps (formerly the grandly named “Heavy Branch of the Machine Gun Corps”) despite having both the models and figures buried deep in the “Projects Pending” cupboard for almost a year.

About two weeks ago I somehow remembered this, and felt that September was a good time to take this part of my Great War project in hand. I’ve not done a huge amount of AFV modelling before. I have seen the incredible skills of many modellers and wargamers on the internet, so I am approaching the project with a certain amount of nervousness!

I’m also hoping to blog “as I go along” rather than finishing the project, then posting the results from the point of view of having completed everything. I certainly enjoy reading those kind of blogs, so I felt I would give that a go. Again, this makes me feel a little nervous, not least in case it all goes wrong in the second week!

So, with a large number of crossed fingers, here’s where I have got to so far with modelling a section of four tanks from “B” Battalion of the Tank Corps as they might have appeared during the Third Battle of Ypres in the second half of 1917.

Why four tanks, why “B” Battalion and why Passchendaele? Well, I chose this unit because of the really excellent recent account of “B” Battalion in Ian Verrinder’s book “Tank Action in the Great War” (Pen & Sword, 2009). I can thoroughly recommend the book as a well-written and interesting read, with new photographs of the tanks and a very moving piece of Ian’s family history wrapped into the text. I chose the Third Battle of Ypres, Passchendaele, simply because it gave me the chance to field a section of four Mark IV tanks, three of which will “male” (armed with a pair of 6-pounder sponson mounted guns, two sponson- mounted Lewis guns and a forward facing machine gun between the driver and the tank commander) and one “female” (armed with four Lewis machine guns mounted in the sponsons, and a forward facing machine gun). The four-tank section gave me the chance to game the actions around Ypres, as well as the actions in the Battle of Cambrai in which “B” Battalion participated, but where sections of three tanks seemed to have been used more.

I thought I would start with a couple of shots of the inspiration for the project. First, the historical books which I’ve been reading over the past year on the Tank Corps. I’m hardly an erudite historian of the great War. Again, there are so many people out there who are. All I can wish is that, when I inevitably go wrong with the history, please let me know and I promise to learn from my mistakes!!


And now some more modern inspiration, which I possibly feel on slightly safer ground with....


By way of introduction, there were eight crewmen in each of the Mark IV tanks. Control of each tank was by 4 men: a commander, a driver and two secondary gearsmen. Each tank also had four gunners. While I don’t envisage all 32 crewmen from the four tanks being out on the table at the same time (heaven forbid all the tanks “ditch” at once), I wanted to make sure that I had sufficient figures to cover at least a couple of the tanks breaking down and the crews leaving the tanks to return to their own lines, or forming ad-hoc Lewis gun parties. The figures are Great War Miniatures, with Litko bases (with hexagonal bases denoting "Big Men" in the "Through the Mud and the Blood" rules). The Great War Miniatures figures to need a little time to clean and prepare, but I feel they repay the attention. You’ll also spot I’ve added a company commander (a Major) and a battalion staff officer, as well as a motorcycle despatch rider. Like the Prince Henry Vauxhall staff car which comes later in this post, these additional non-crew figures are really for “fluff”, but there may be a scenario I can use them in somewhere. They’re lovely figures, anyway. Here’s the shots of the undercoated figures (and yes, that is a stray German anti-tank rifleman in the background).....


Here’s the figures with their faces done and base coats of some of the uniforms. I wanted to paint a mixture of overalls and uniforms on the tank crew, both being evident in quite a few photos in the books. My first thought was that the Tank Corps crewmen wore black overalls, but I seem to have gone wrong in my research. I found out this weekend that the overalls were a mixture of khaki, tan and dark tan. How long they may have stayed this way is another matter. Lieutenant A.A. Dalby of “B” Battalion wrote home in January 1917 that “I wish you could see me come in from my present course. Clad in overalls (khaki) and absolutely one mass of grease, oil and dirt” (“Tank Action in the Great War”, page 26). There is also a magnificent photograph of Second-Lieutenant Reginald Lyles at the Tank Museum at Bovington wearing what appears to be a pair of leather overalls, suggesting that officers might well have supplemented standard overalls from time to time.


I also wanted to add a couple of casualty bases to place besides the tank crews to signify “shock” in the "Through the Mud and the Blood" rules. “Shock” could be inflicted on the crews if they are unfortunate enough to be outside the tanks once the tanks “ditch” in rough terrain, break down or are disabled by the enemy. There are some very disturbing images of dead tank crews in contemporary photographs, particularly of badly burnt crewmen (photograph page 14 in “Tank Action in the Great War”). I would never want to model such grim material, but didn’t want to leave out a reminder of the horrific casualties the early tank crews suffered. So, here’s some generic casualty figures which I purchased from Steve (“Silent Invader”) on Lead Adventure Forum, with some suitably “tank focused” bits of battlefield debris manufactured from plasticard, plastic strip, bricks (matchsticks cut up), picture wire, Styrofoam (petrol cans) and a selection of resin and metal bits (revolver, ammunition box).


Now on to the four tanks themselves, which you can see I have not even started. I've put two in the picture, a Mark IV female on the left and a male Mark IV on the right. They’re both resin models from Great War Miniatures, being well detailed and finely cast.


I also wanted to paint a couple of Austin armoured cars at the same time. These were not part of “B” Battalion, but these cars were operated by one of the Tank Corps battalions in 1918. I think adding the armoured cars to my British forces should give some interesting scenarios.


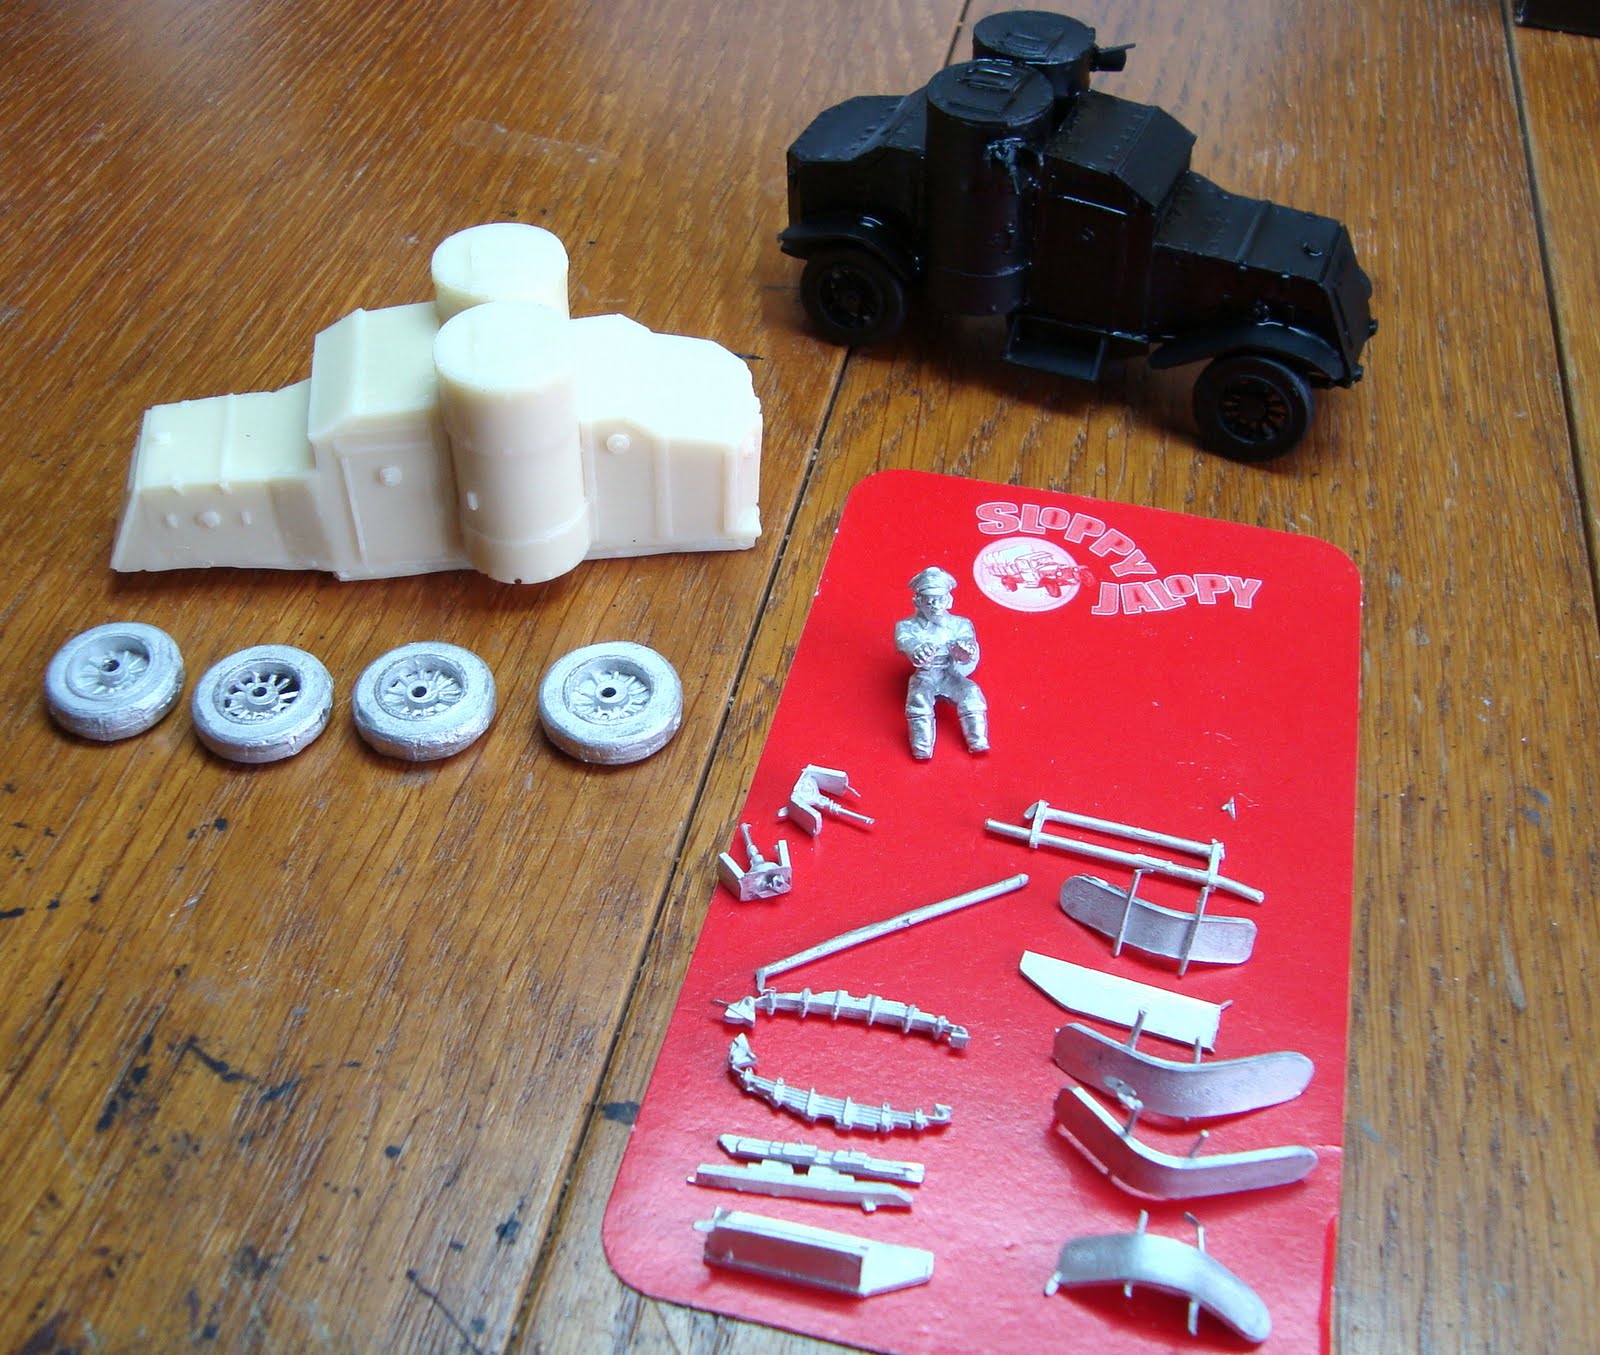
Both are from Sloppy Jalopy in the UK. I managed to assemble both in about a couple of hours, the second one being quicker than the first. I found the suspension on the Austins a little tricky at first to glue on, having to balance the model carefully upside down.


Once the model is stable, however, the suspension, the axle and the wheels glue on pretty easily.


I tend to use an epoxy resin for modelling resin/metal kits. Perhaps this is force of habit, but it also seems to me to give a better, slightly less brittle join than superglue. Perhaps this is just another of my legacies form the 1980s!

The door-shelf on the Austin glues on quite well, as does the plate below the door on the other side of the car. Unfortunately, the Sloppy Jalopy models don’t come with instructions, so searching some images on the internet to try and find the exact configuration of the kit components is time well spent. I wanted to ensure that the shelf and metal side plate stayed in place and I supported both with a wadge of green-stuff as well as gluing both the metal shelf and plate to the resin car with the expoy.


All in all, I thought that the Sloppy Jalopy Austin armoured car kit was good value for money and went together reasonably well. I did need to some work on it to make it robust for the tabletop, and its perhaps fair to say that it’s not a ideal starting resin model for beginners. By contrast, (on the plus side) there are very few parts to go badly wrong. I also got great service from Richard at Sloppy Jalopy, and I think that always sets you in a good frame of mind to make a model.

I also added a 1914 Prince Henry Vauxhall to the force, this really being a little “fluff” for the back rank of the wargames table. My idea was to possibly use this in a scenario to signify a company headquarters, especially with the two senior officers and the motorcycle despatch rider. The model was “Y-02-3” in the Matchbox Models of Yesteryear range, picked up on Ebay.


The bases of the cars are all marine plywood, and then textured using fine gravel and cardboard. The random bricks dotted around all the bases are cut matchsticks. I like the idea of a more “industrial” feel to my Great War terrain, and have been adding a few ruined factories and commercial buildings over the past few months for a contrast to the more open terrain boards we built last year. I painted the bases completely before pinning and gluing the primed and undercoated vehicles to the bases.

Well, that’s my Tank Corps work-in-progress started. I’ve done some more work over this weekend on the figures, and I’ll hopefully post later this week to let you see things moving along a little further. For anyone wanting to see additional work-in-progress pictures, I’ve posted some more on my Flickr page – just follow the link on the blog.
Related Posts Plugin for WordPress, Blogger...